When we last left Those Crazy Gilberts…

The port-hole of Subject Delta‘s helmet had just popped out. I, Sara, put my book down and locked eyes with Daniel. There was a manic energy there. He had done it, but what exactly had he done? We shared a collective exhale and then turned our eyes down to our papier-mâché baby. Had we done irreversible damage or had we rocked it?
 There it was. A huge gaping hole looking up at us from Daniel’s lap. I studied it. Daniel studied it. We looked at each other, wide eyed and silent. I grabbed the port-hole we’d made out of craft foam and dowel rods and I laid it over the hole. What do you think? Did we rock it?
 I’d say we rocked it alright! Next, we glued two layers of the 2 mm craft foam along the edges of the harness with Daniel’s trusty Elmer’s glue. And then, it was time to take care of the two holes for the lights on the front of Subject Delta’s helmet. Again, we searched for ways to delay having to make the big cuts.
If you look at the reference photo, you’ll see that not only did we need to cut holes for the air tubes but there’s a third hole near the top of the helmet as well. However, we needed to drill through the actual construction helmet for this top hole. Since Daniel did the drilling, I’ll let him tell you a little bit about the process. — Sara

As nerve racking as it was to cut through the papier-mâché and cardboard skeleton of the helmet it was even more nerve racking to drill holes in the helmet, especially for the port up near the top where we had to drill through the construction helmet base. I was afraid that I would use the drill at too high a speed and it would somehow get snagged and shred the helmet irreparably. But first, we had to figure out where the ports would go. We decided to start with the placement of the top port first as it was able to stand alone in it’s positioning. However, we found that when we went to position the air hose ports that we had a slight alighnment issue. Due to the slight imperfections of the helmet’s surface the angles were different on either side of the port-hole. We had to make sure to position the ports at the same angle (just slightly asymmetrical is spacing) so that the air tubes would come off the helmet at the same angle on both sides. We trusted that this would give us a constant look rather than making sure they were equidistant from the port-hole. — Daniel
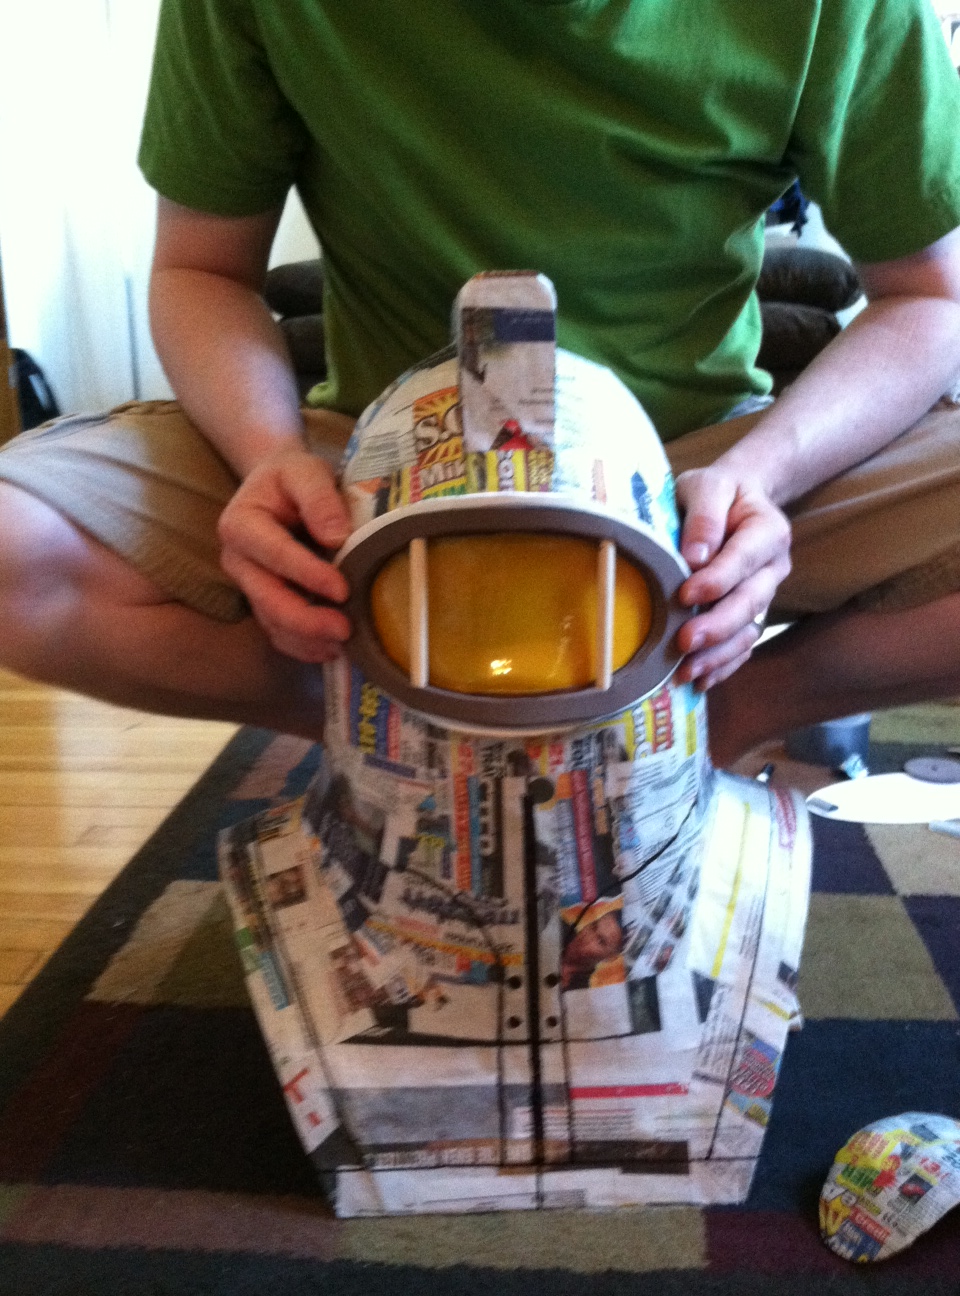
We had put off the light ports long enough, but our nerves kept us cautious. We’d come to accept the fact that our proportions were not going to mimic the references exactly but we didn’t want to position the lights so high on the helmet that the eye would go directly to the tubular shape or our helmet rather than the squatness of the shoulders and harness. We had learned a lesson from the air hose portals; angle and proportioning are more important that symmetry. We sat on the couch positioning card board cut outs of our lights again and again on the helmet. I can always tell when we’re attempting a very stressful step when we start snipping at each other. My directions of “slightly left,””a little up,” and “a fraction more left” were starting to wear on Daniel’s nerves; we were having trouble seeing something three dimensional.
 We finally had to bite the bullet, trust ourselves and go for it. Daniel did the cutting again, using an X-acto knife just like he did with the port-hole. And once again, we had a helmet with gaping holes looking up at us. We couldn’t tell how well we’d done until we put the lights in. Oh! We haven’t talked about the lights yet have we? Even though I know you’re all dying to know how the helmet turned out, let’s take a side trip to the lights.
We bought a couple of basic push lights but we needed a way to make them yellow since it’s darn near impossible to find them pre-colored. We found a site that said they had them only to find out, after we had placed an order, that they were out of stock and were not planning on restocking. Yes this was frustrating but we knew that this meant we had to be more creative!
I remembered making stained glass with paint and a frame as a kid; where you’d fill in a stencil type mold with thick paint that would dry in the shape of the frame and I thought, as we perused Michaels why not give it a try! (This was originally meant to be a a part of the port-hole.)
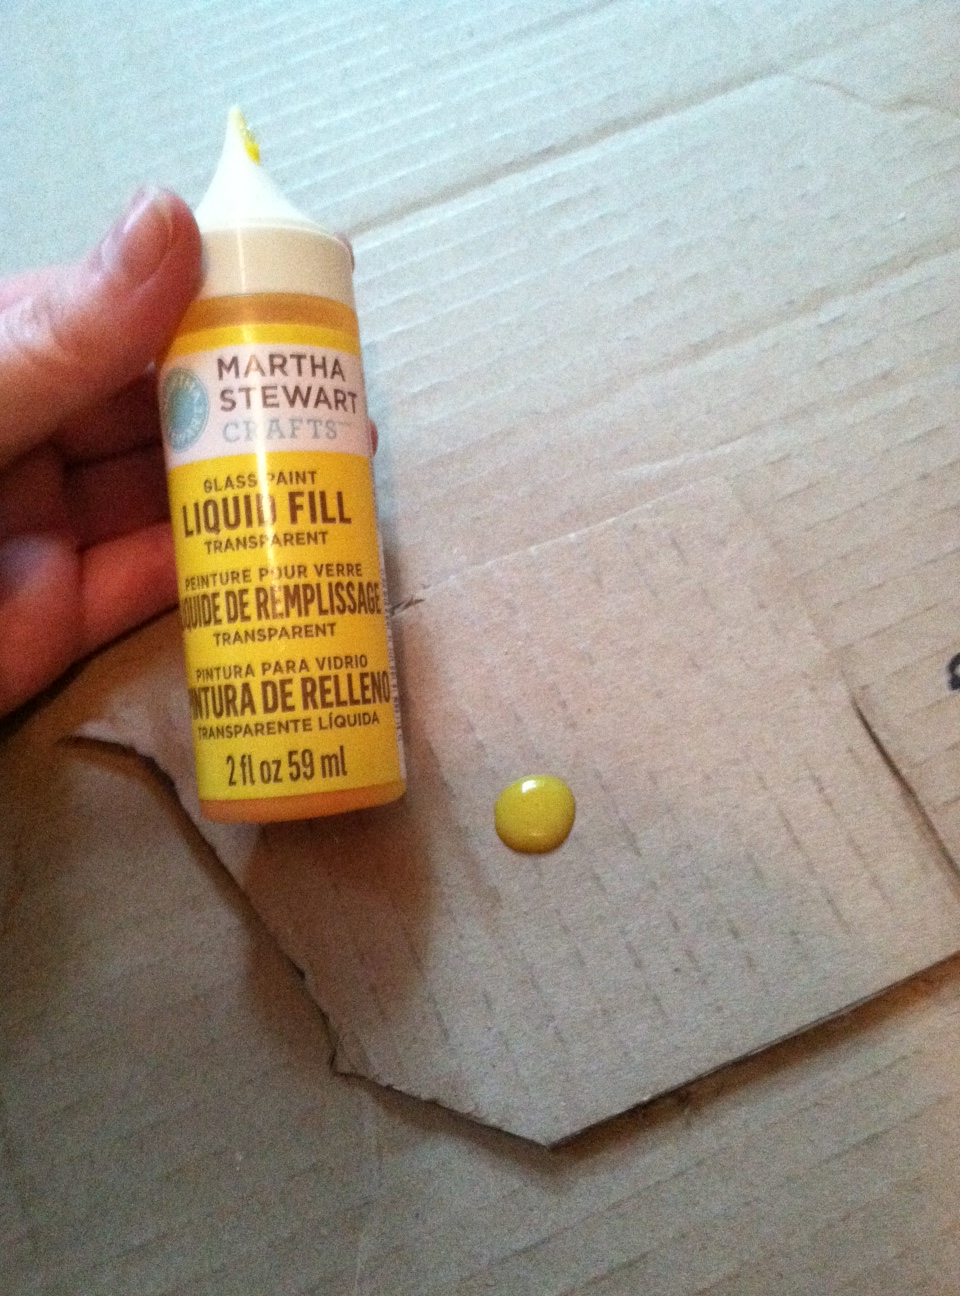
Martha Stewart Crafts Liquid Fill. We cut a port-hole sized ring and globbed this stuff into it. We let it dry and our hopes were really high. Here’s a really epic picture of Subject Delta’s helmet with the gel.
 Sadly, it was too opaque and Daniel couldn’t see through it. But we didn’t let it go to waste. Another plus to using this stuff is that it’s clingy and it lets light through… so we put it on our push lights!
And now, the moment you’ve all been waiting for; how did the helmet turn out?
 I know. Right?
Daniel couldn’t wait to put it on so we’ll close this week’s update with a classic action shot!
Check back next week – we’re making headway!!! — TCG


Impressive! I am not as familiar with the first Bioshock game, but I’ve seen reference images and this looks great. I really appreciate your approach to documenting the project–a very enjoyable (and informative) read!
Thank you so much! We’re learning so much from trial and error and we definitely hope that others can use some of the techniques we’re learning and writing about.
Looks AWESOME!!!!!
Wow, that’s looking amazing 🙂
Thank you so much guys! I feel like we’re coming into the home stretch – with the helmet at least. — Sara