Tag Archives: Costumes

Level 10:1 – Power Up Acquired!

1 Jul

1280px-SubjectDeltaArmConcepts1

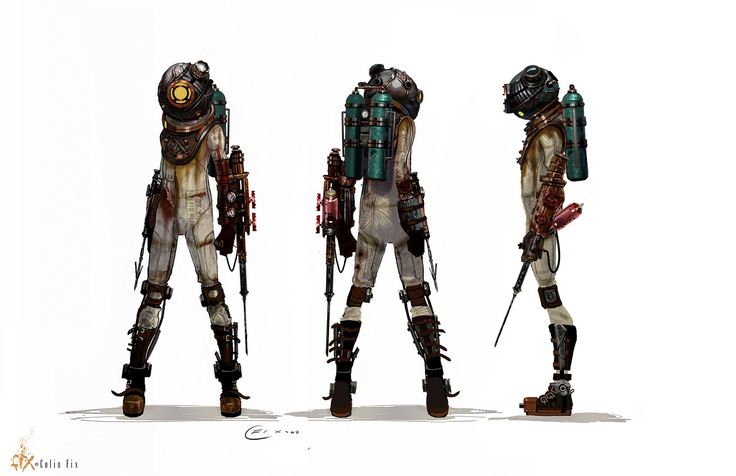
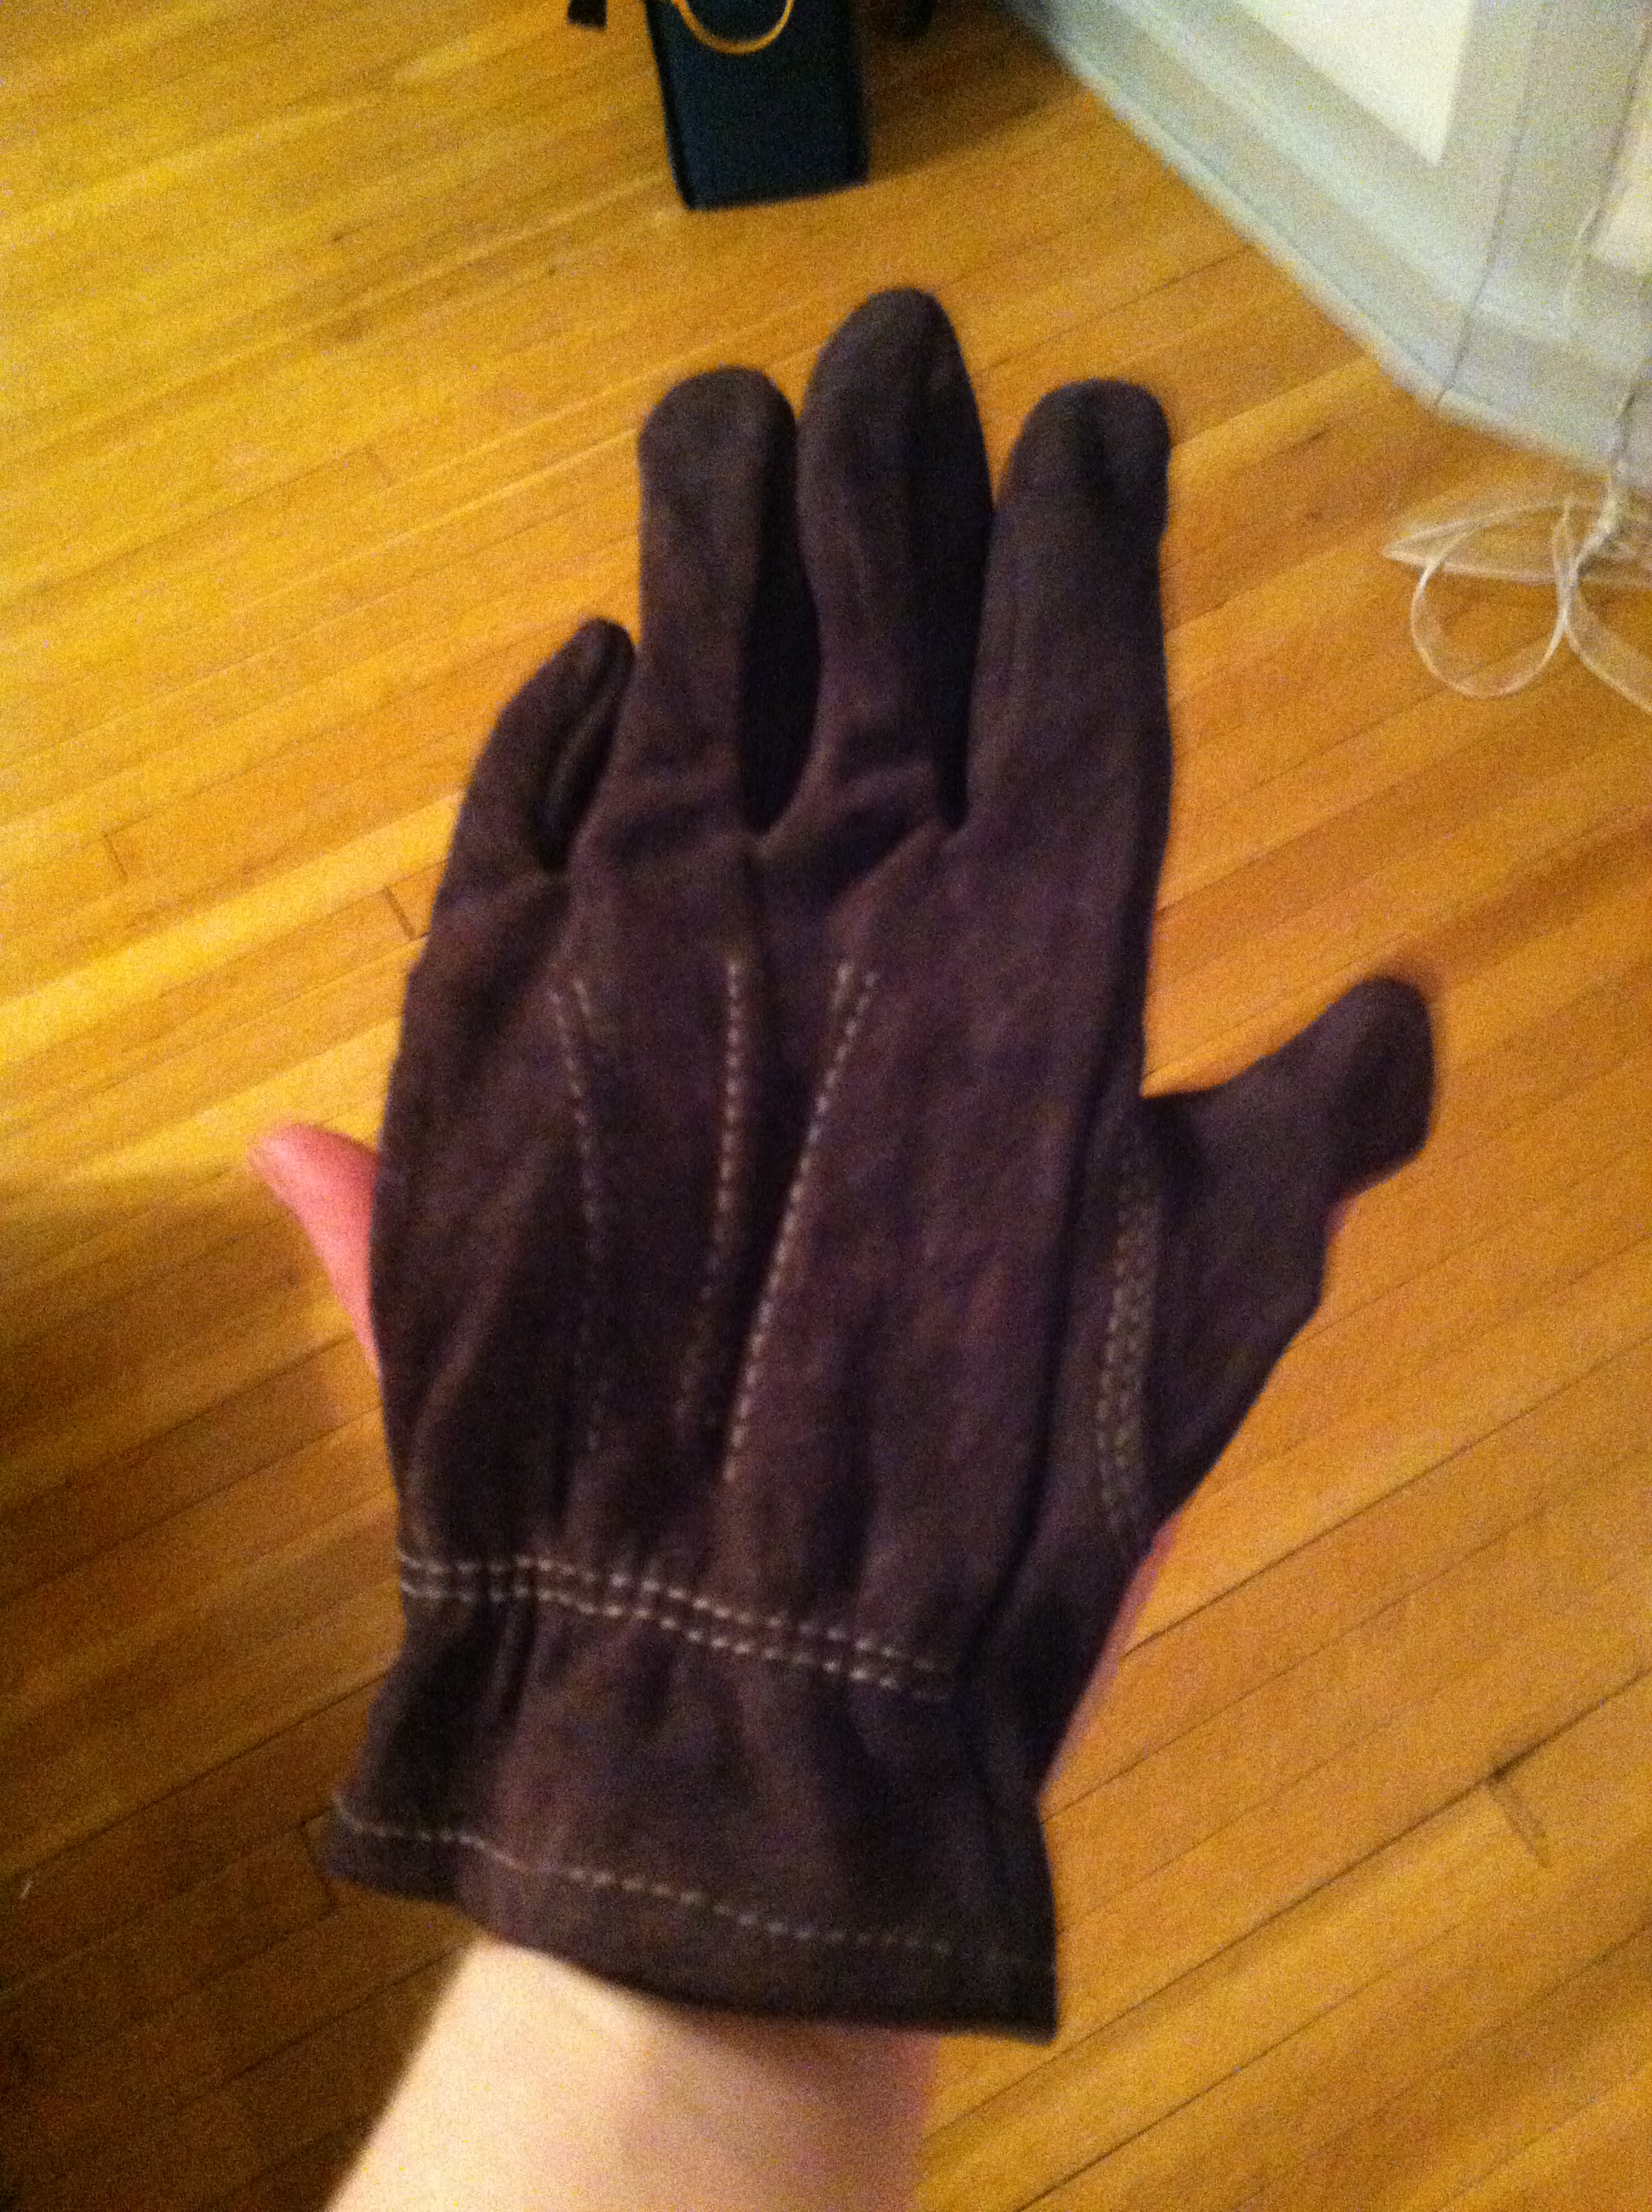
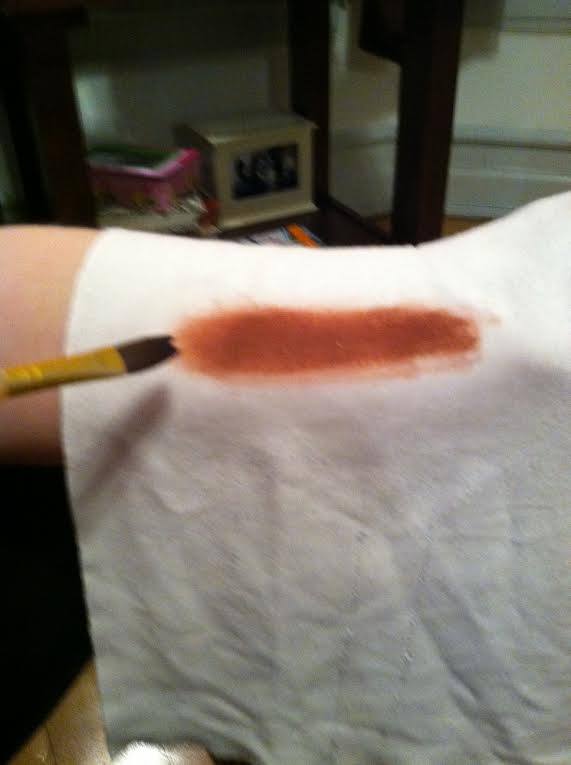
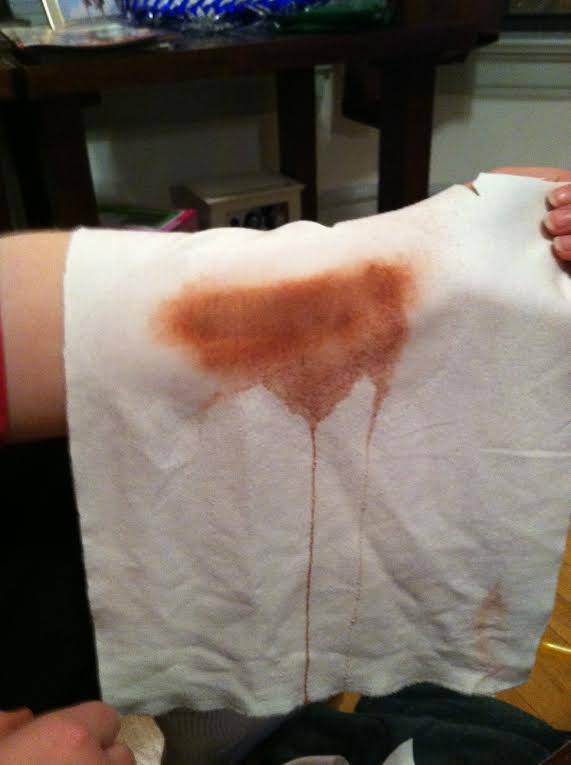
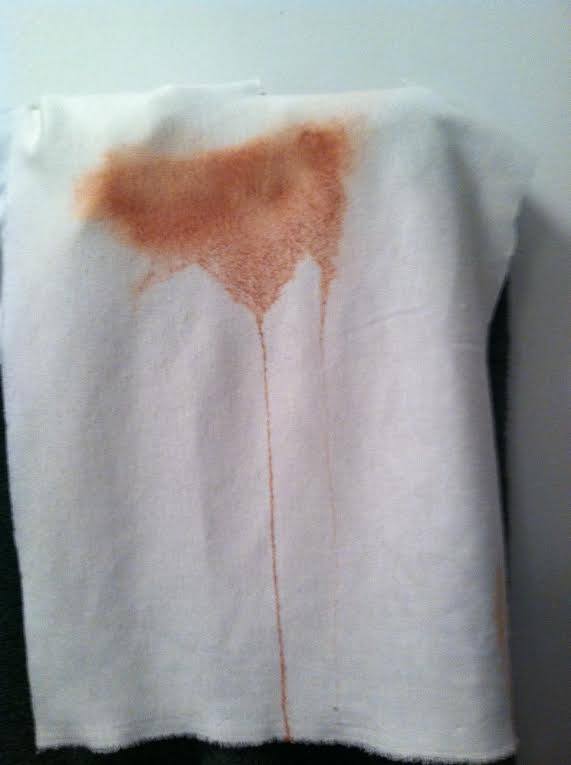
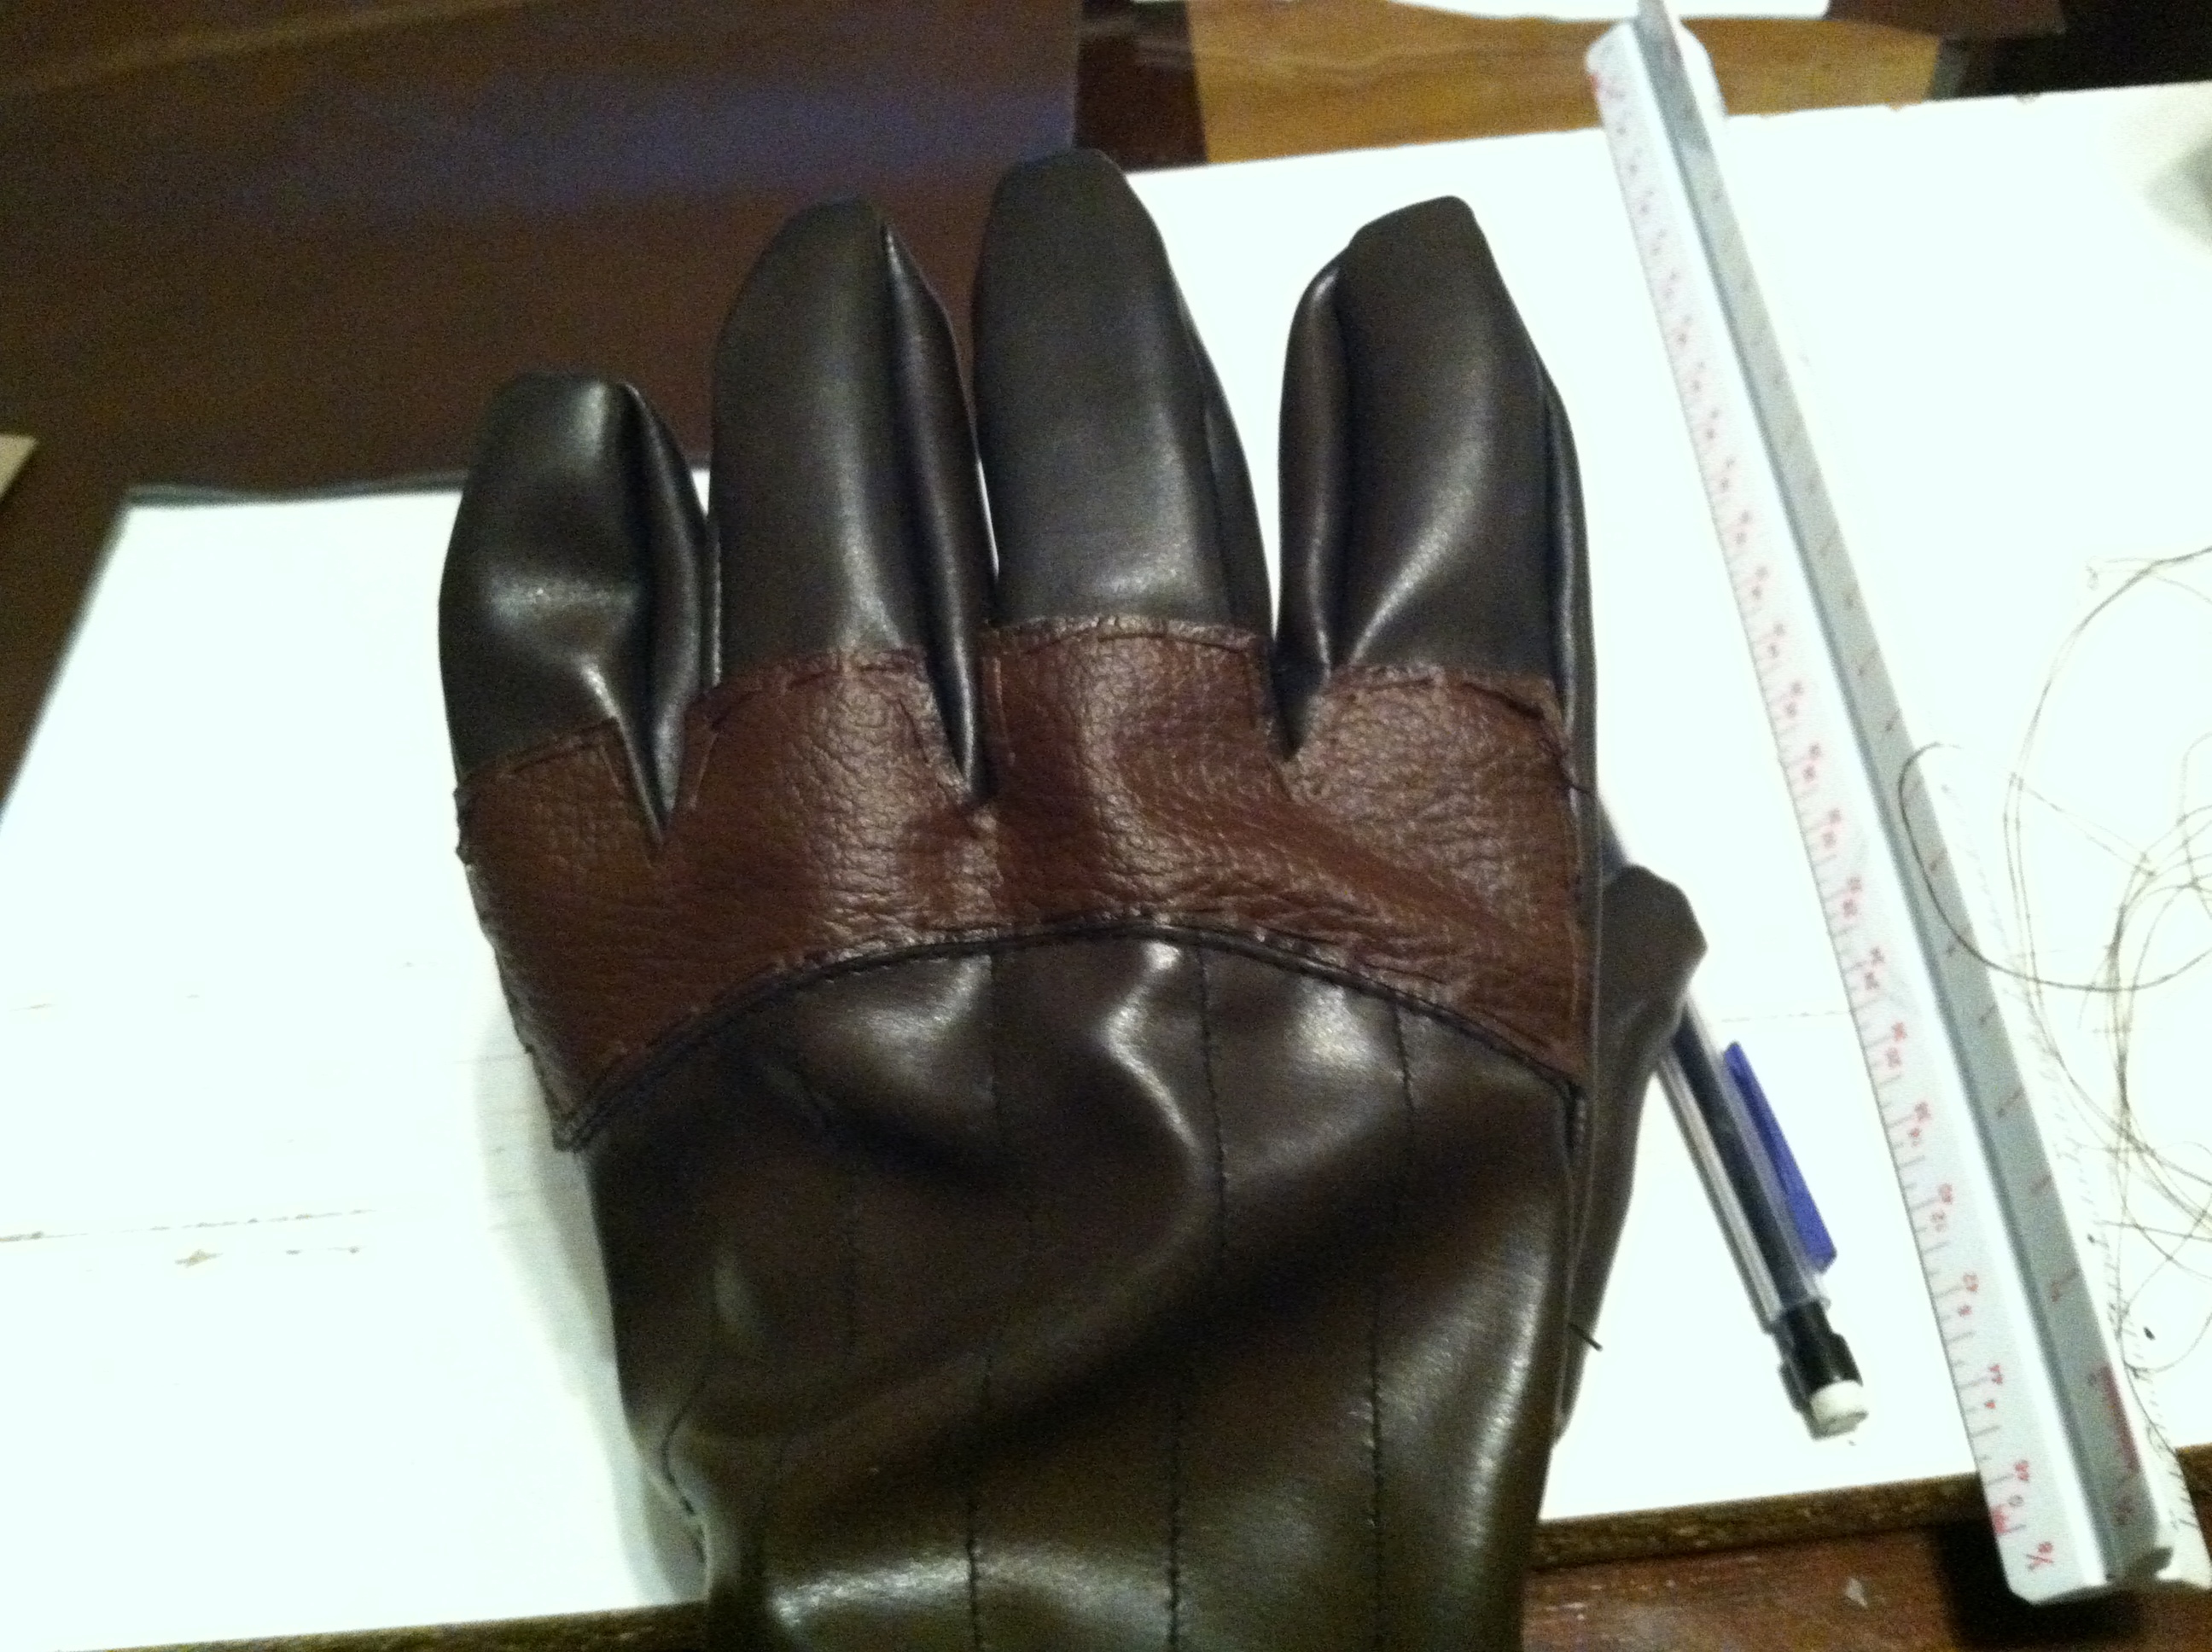
One of the coolest elements of Bioshock  is the use of Plasmids! People in the Bioshock series use these by injecting the EVE directly into their blood stream and it endows them with powers and abilities. Subject Delta has a glove that allows him to pull EVE from a tank of his back and flow it directly into the veins at his wrist. We searched and searched the internet and hardware stores to find the ideal glove to serve as the base for Subject Delta’s glove and in the end we appropriately settled on some Halloween Darth Vader gloves. They were made of the perfect material, had the perfect look and were the perfect size and shape. The gloves are one-size-fits-all for adults and come in black so we started by spraying the glove with a couple of light layers of Brown Leather paint.

Subject Delta Cosplay GlovesIf you’ll notice from the reference photo there are some very distinct sections on the glove. On the palm side of the glove there are six ports; one on each finger, one on the thumb and one in the palm. These ports are used to conduct and control Plamids. On the back side of the glove there’s a series of knuckle plates, a speaker box with the delta symbol, and forearm panel with a port and a gauge. In the game you see that the port is used as an injection point for the Plasmid syringes and the gauge I assume is used to determine dangerous usage levels. You’ll also notice that each of the three panels on the back of the glove appear to have a patch under them. So, we started by crafting  these three patches out of some faux leather. We cut out two rectangular patches for the speaker box and Plasmid control panel and a customized piece for the knuckle plate. We then hand stitched the patches for added detail and sewed then to the gloves. Here’s a good shot of the customized patch for the knuckles that Sara made after we’d trimmed it and sewn it on.

IMG_0764


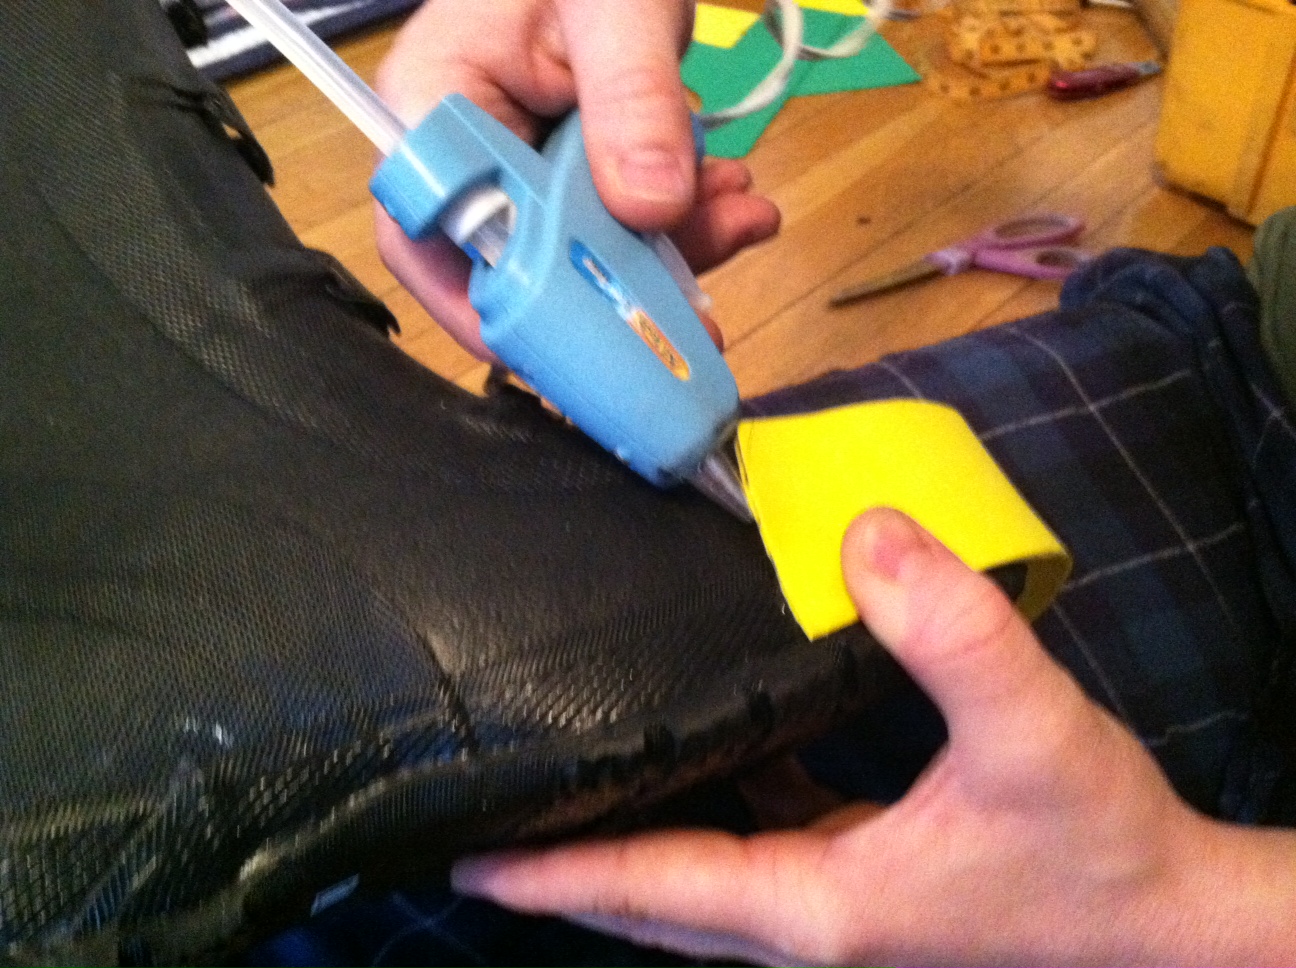
With all the patches in place we started on the knuckle panels. We cut out four contoured rectangular pieces from 2 mm foam and then used our hole punch tool from our grommet kit to punch out four rounded foam pieces from 5 mm foam. We hot glued the rounded pieces to the flat, rectangular pieces and laid them in place to see how they fit.

IMG_0763

Man that’s already starting to look gnarly!!!

We trimmed the leather patch to more closely fit the contours of the glove and then in turn trimmed the foam pieces to more closely fit the contours of the customized leather patch. Once we had the shapes right we sewed the knuckle patch into place, sealed the knuckles pieces in Elmer’s glue and hand painted them brass and steel. Once they were dried we then used Shoe Goo to attach them.

IMG_0721
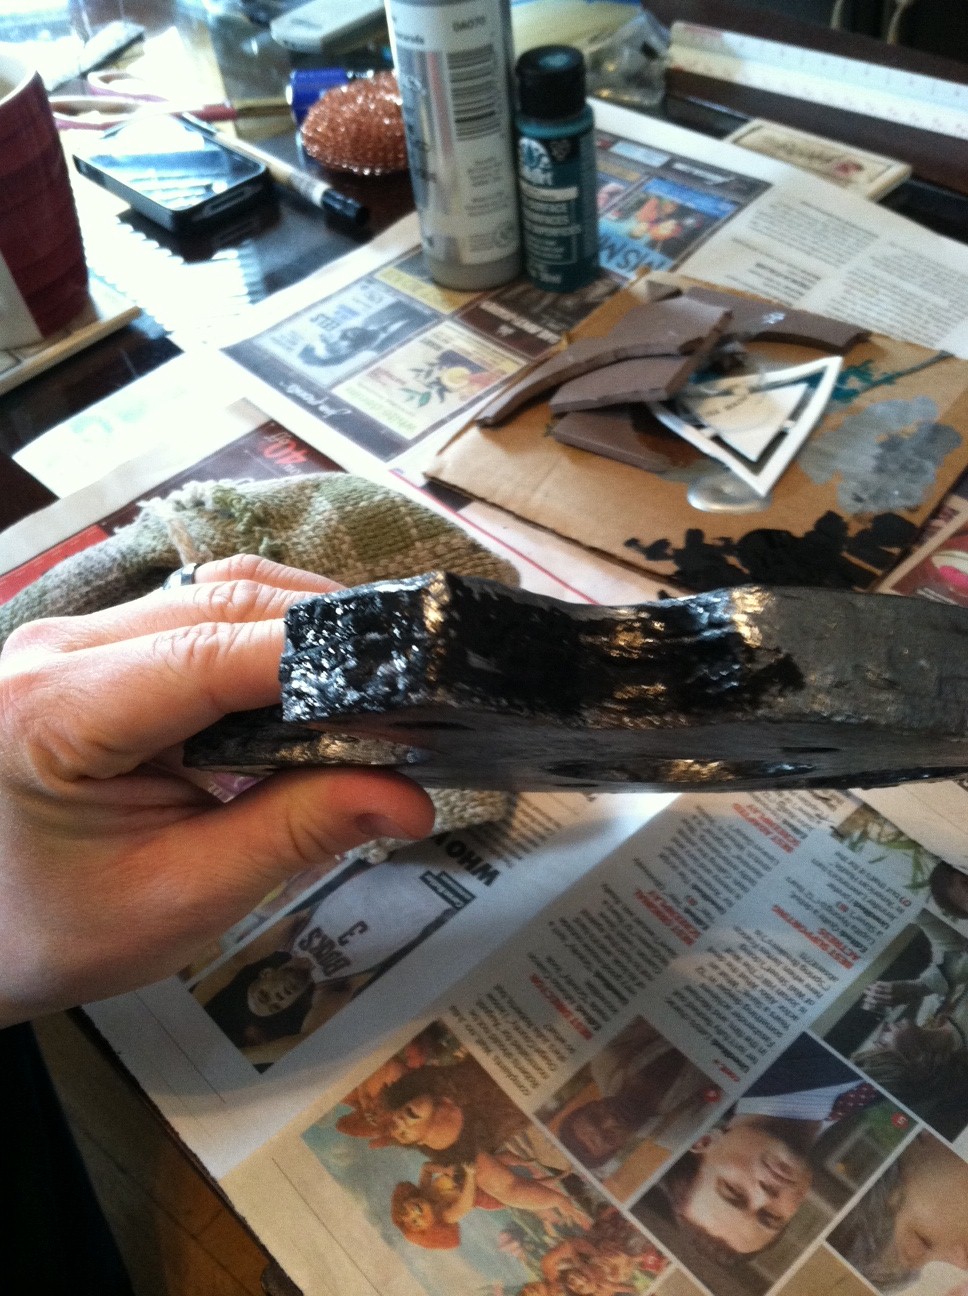
Next we moved on to the speaker box. For the speaker box, you’ll notice that it’s not just a flat metal panel. It’s raised at the front and slopes down the back like a small ramp. I cut out two large rectangular pieces of foam from the 2 mm foam; one to serve as the base for the panel and the other to serves as the top speaker ‘section.’ Along the front edge of the base piece, I attached a section of our weather sealer to serve as a ‘lift’ along the front edge. I then drilled a series of holes in the top piece to give it that old-timey speaker look. I hot glued the pieces together to form the lifted, ramp-looking shape.

IMG_0769

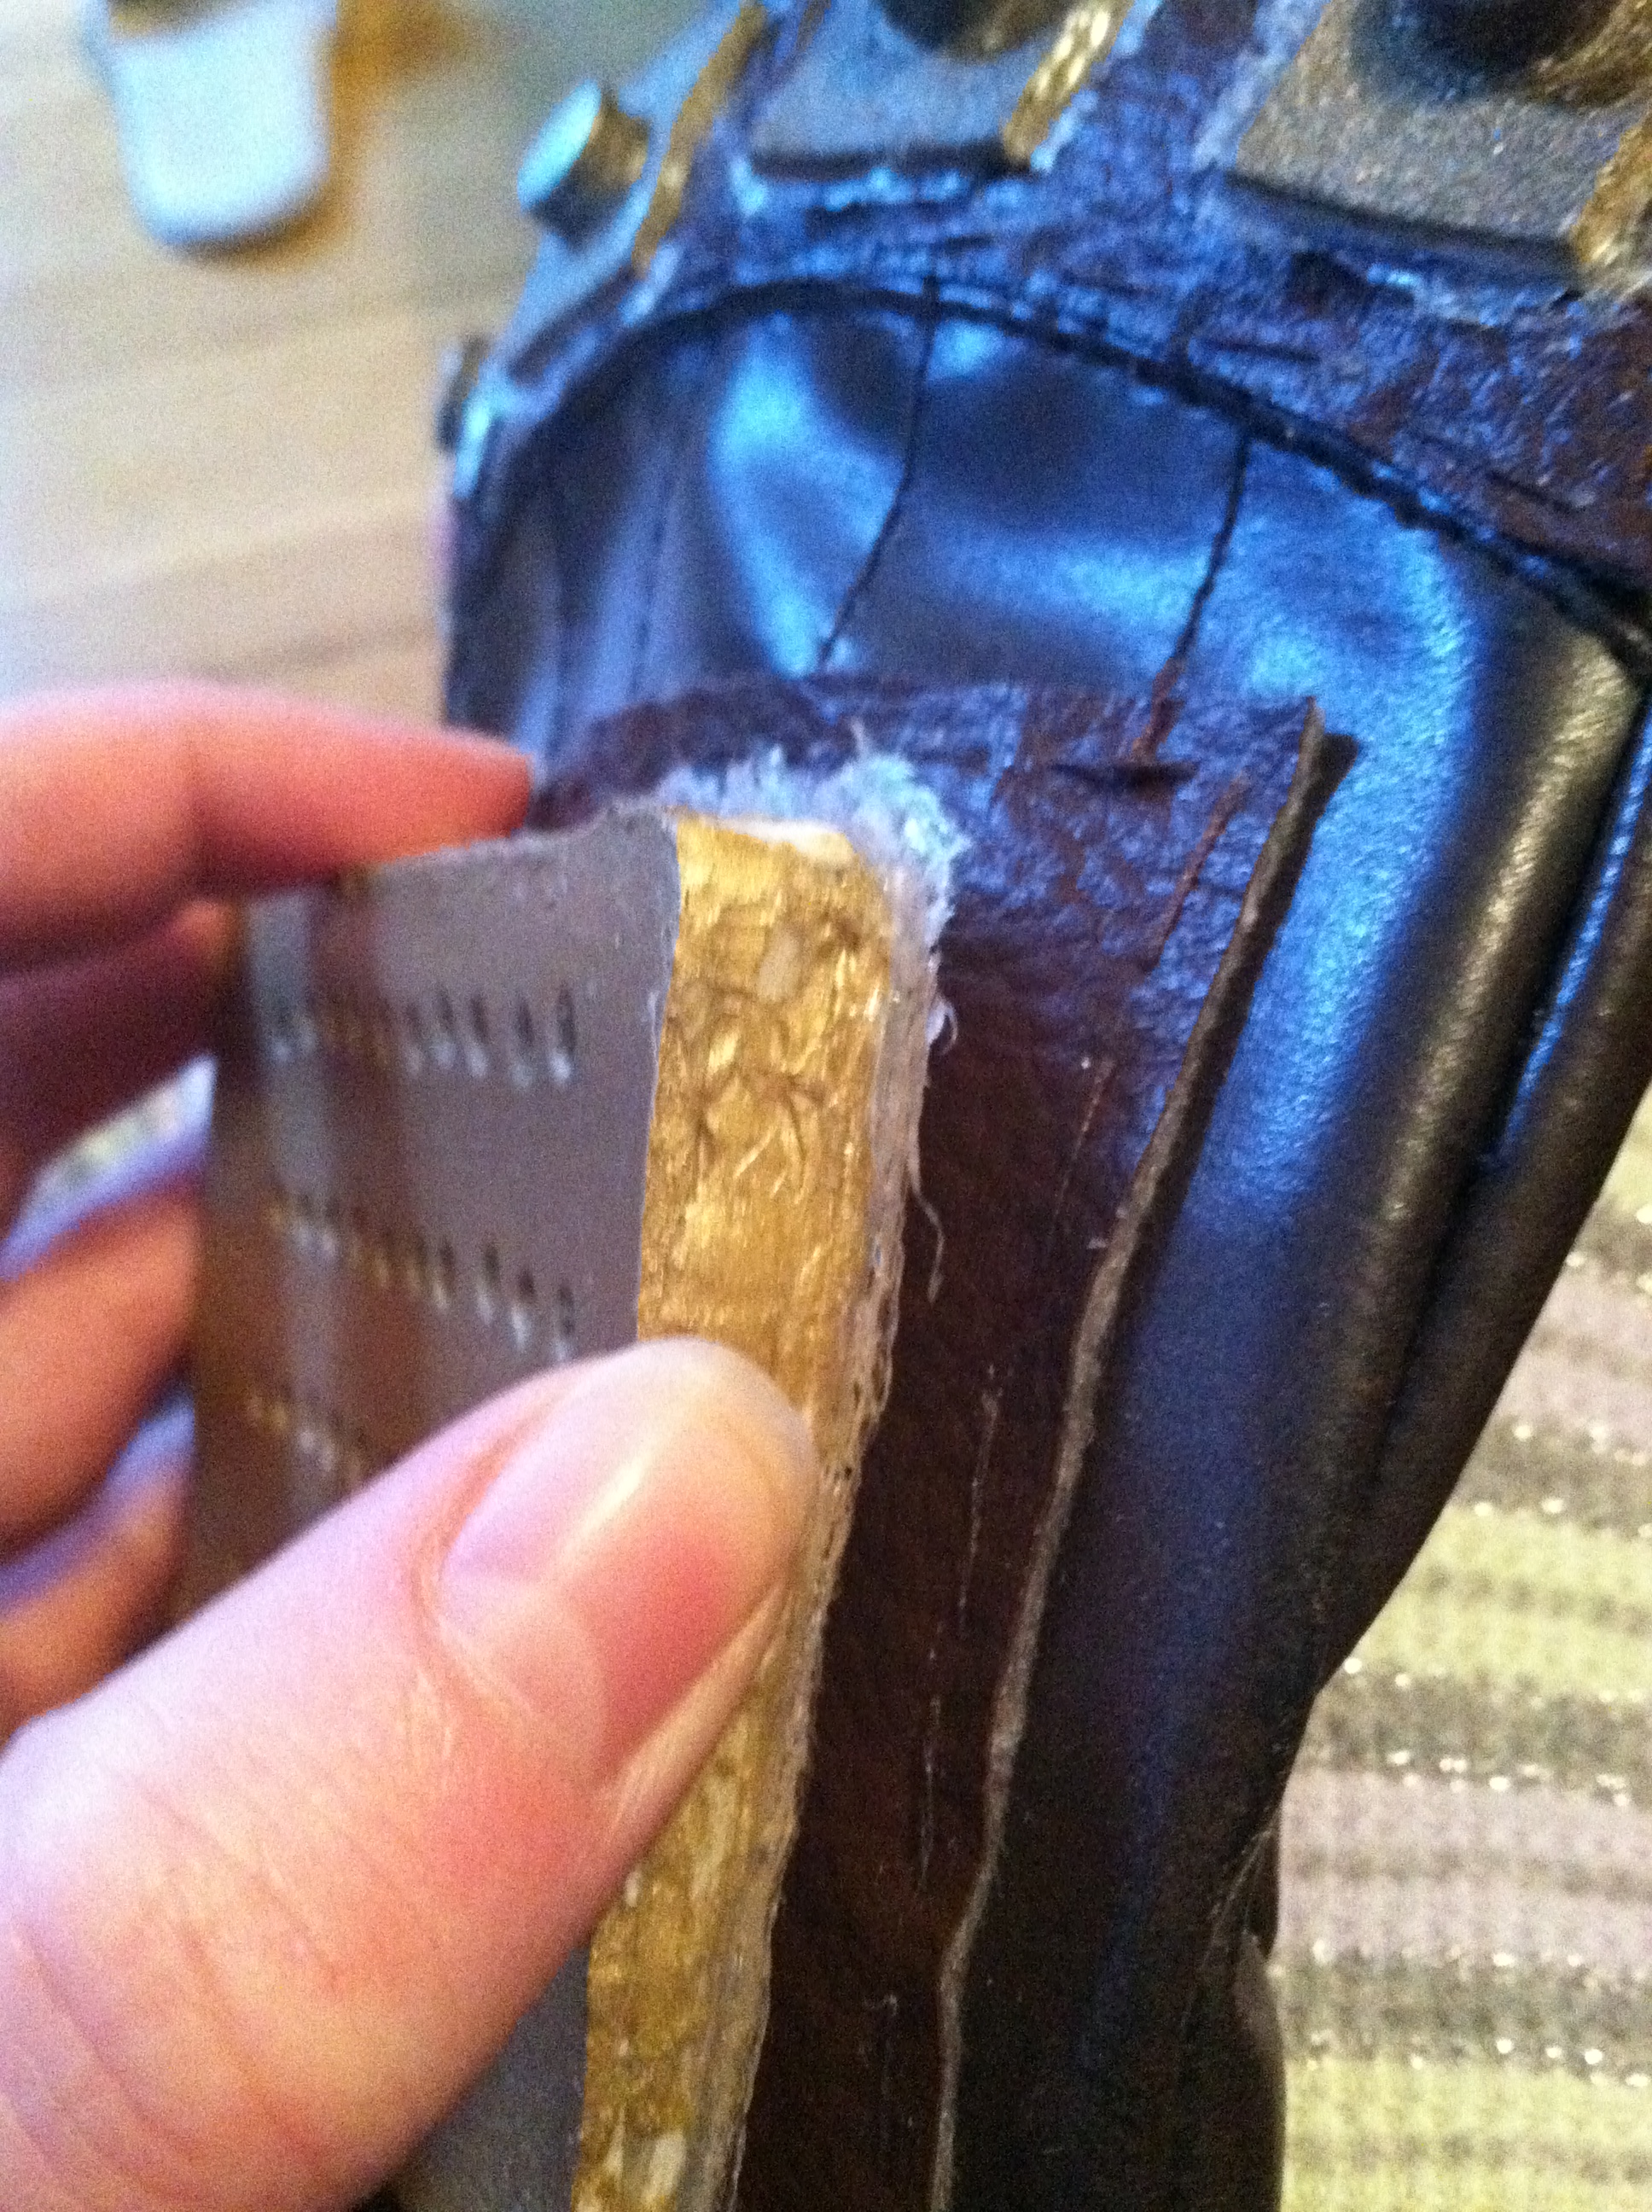
To finish the piece, I cut out 2 mm foam sections for the front and sides and hot glued them in place. I then sealed the panel with Elmer’s glue and painted it a polished brass. Once dried, we Shoe Goo’d it to the leather section on the back of the glove. At first, we tried to hot glue these foam pieces onto the leather but, as you can see in the close picture below, it wasn’t holding. Rather than try to re-glue it with more hot glue, we started looking for other options. That’s when we stumbled across the Shoe Goo. We’re recent converts to the contact adhesive cult and we have no plans to ever leave it.

photo (5)

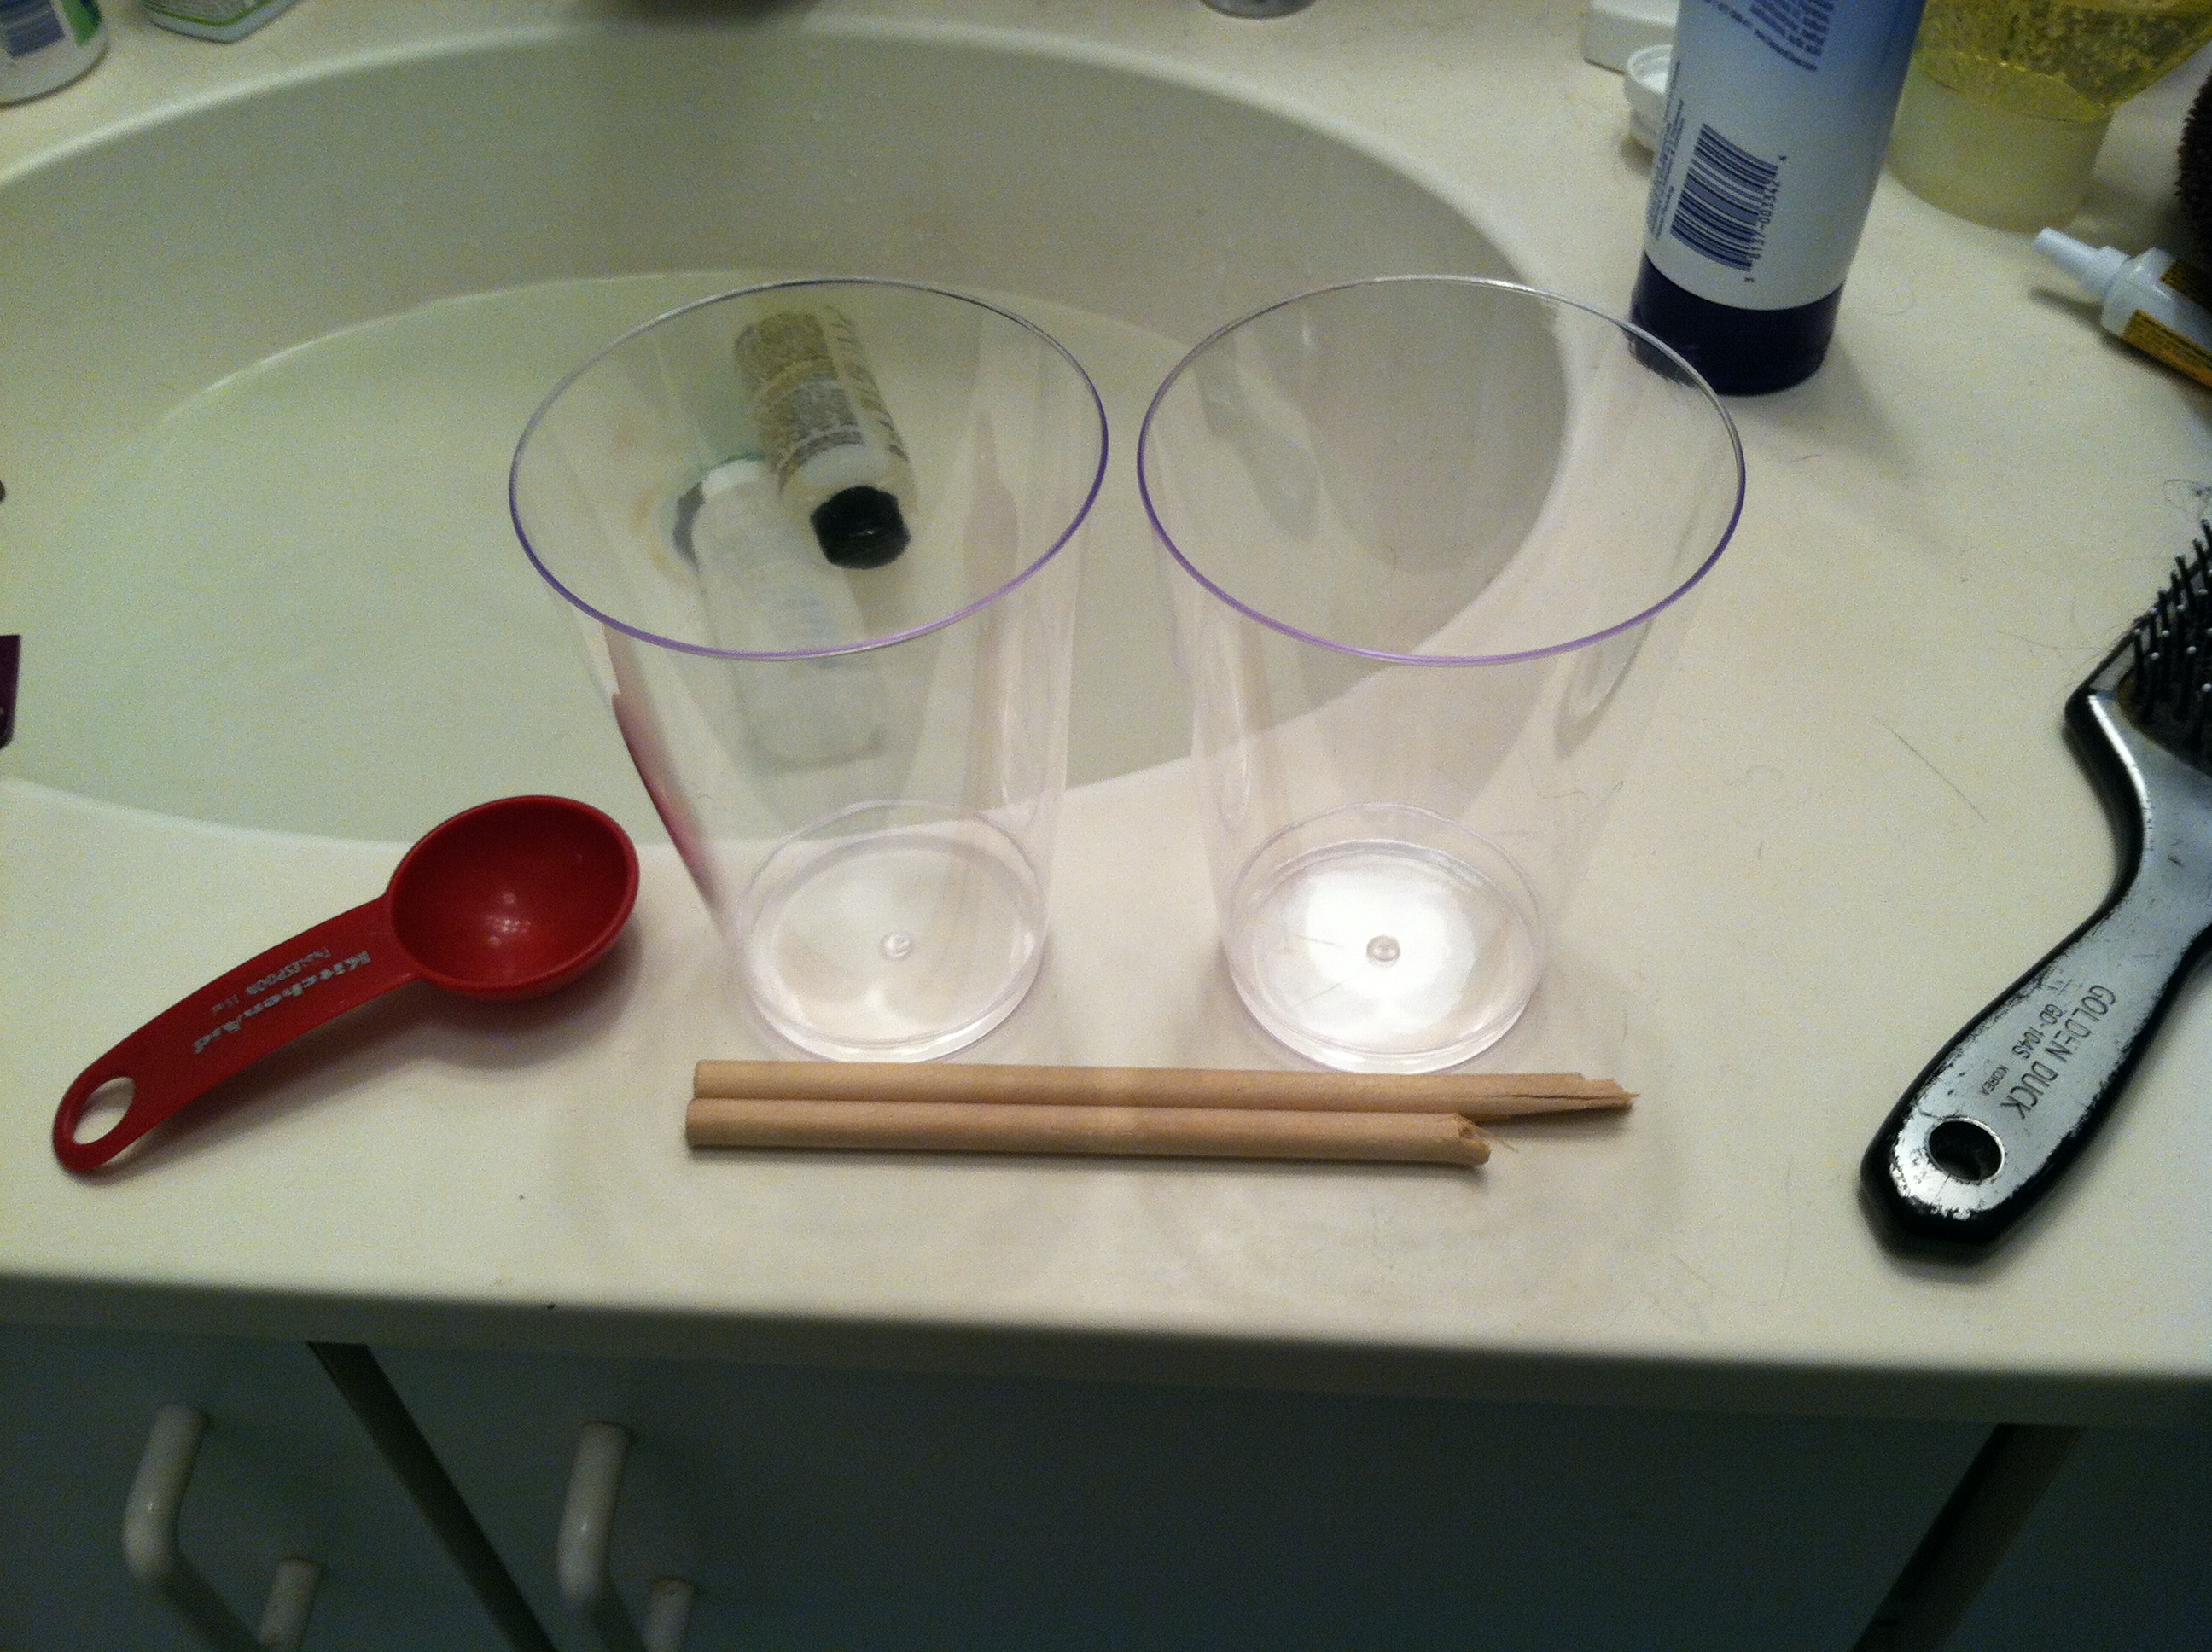
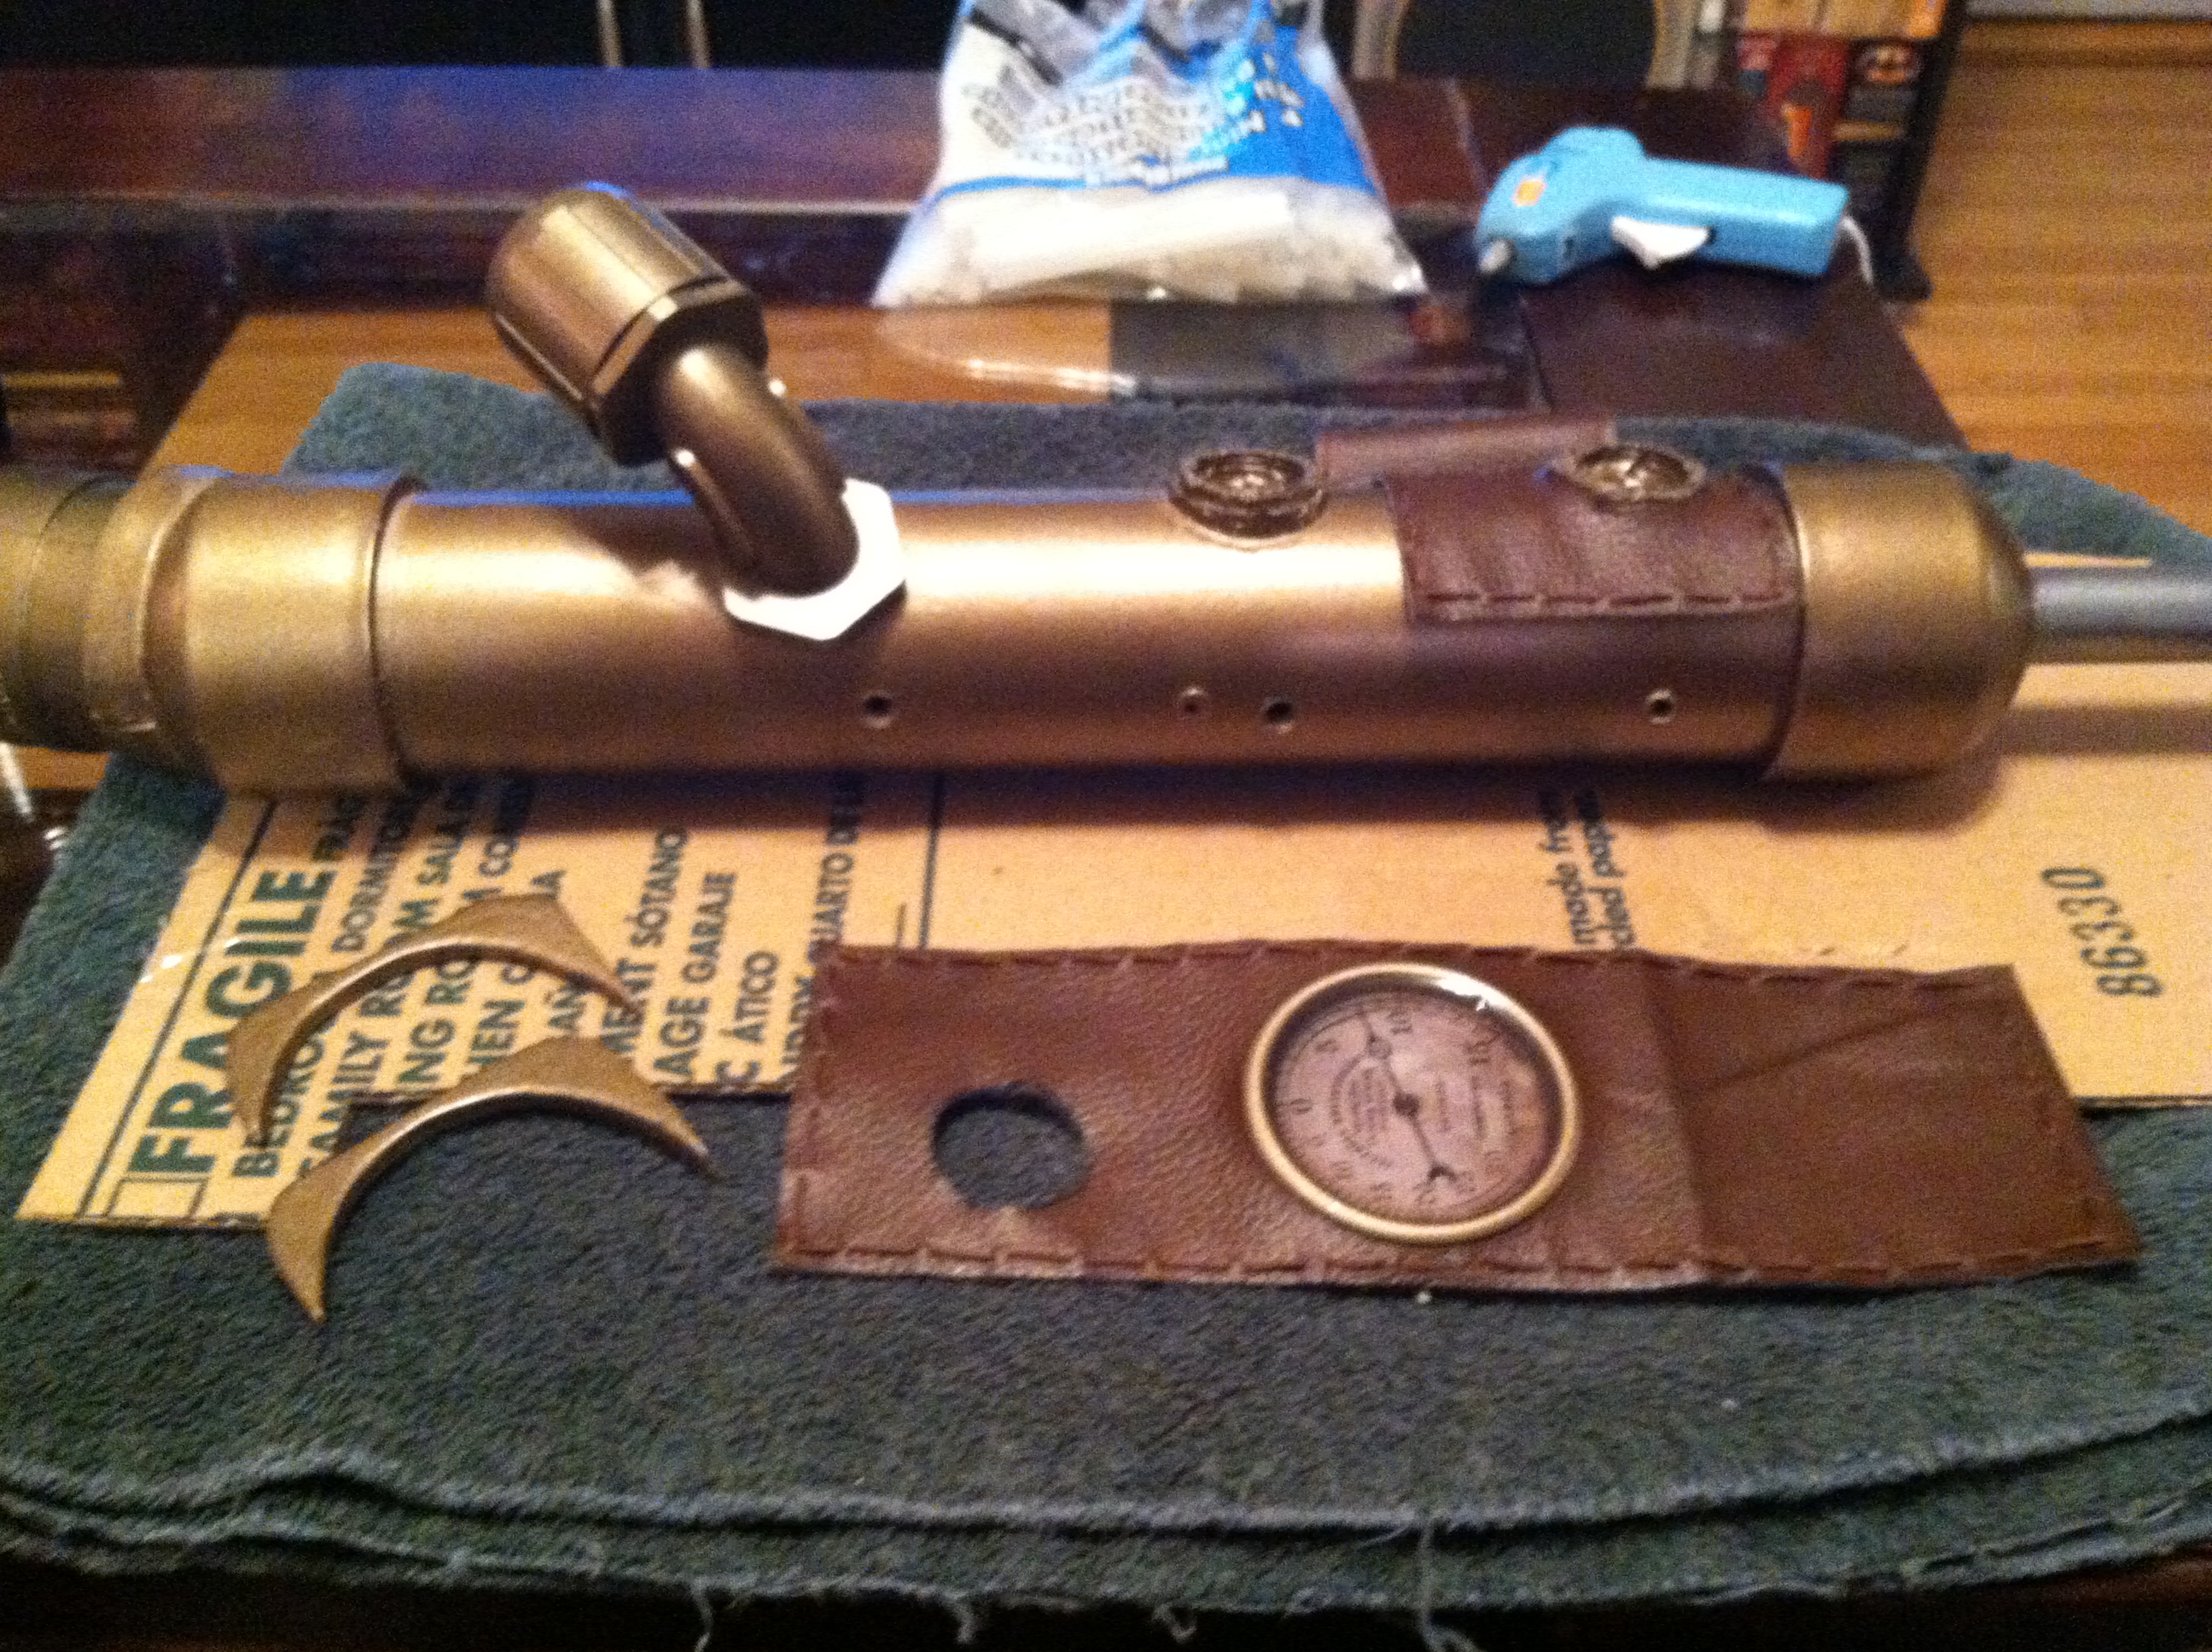
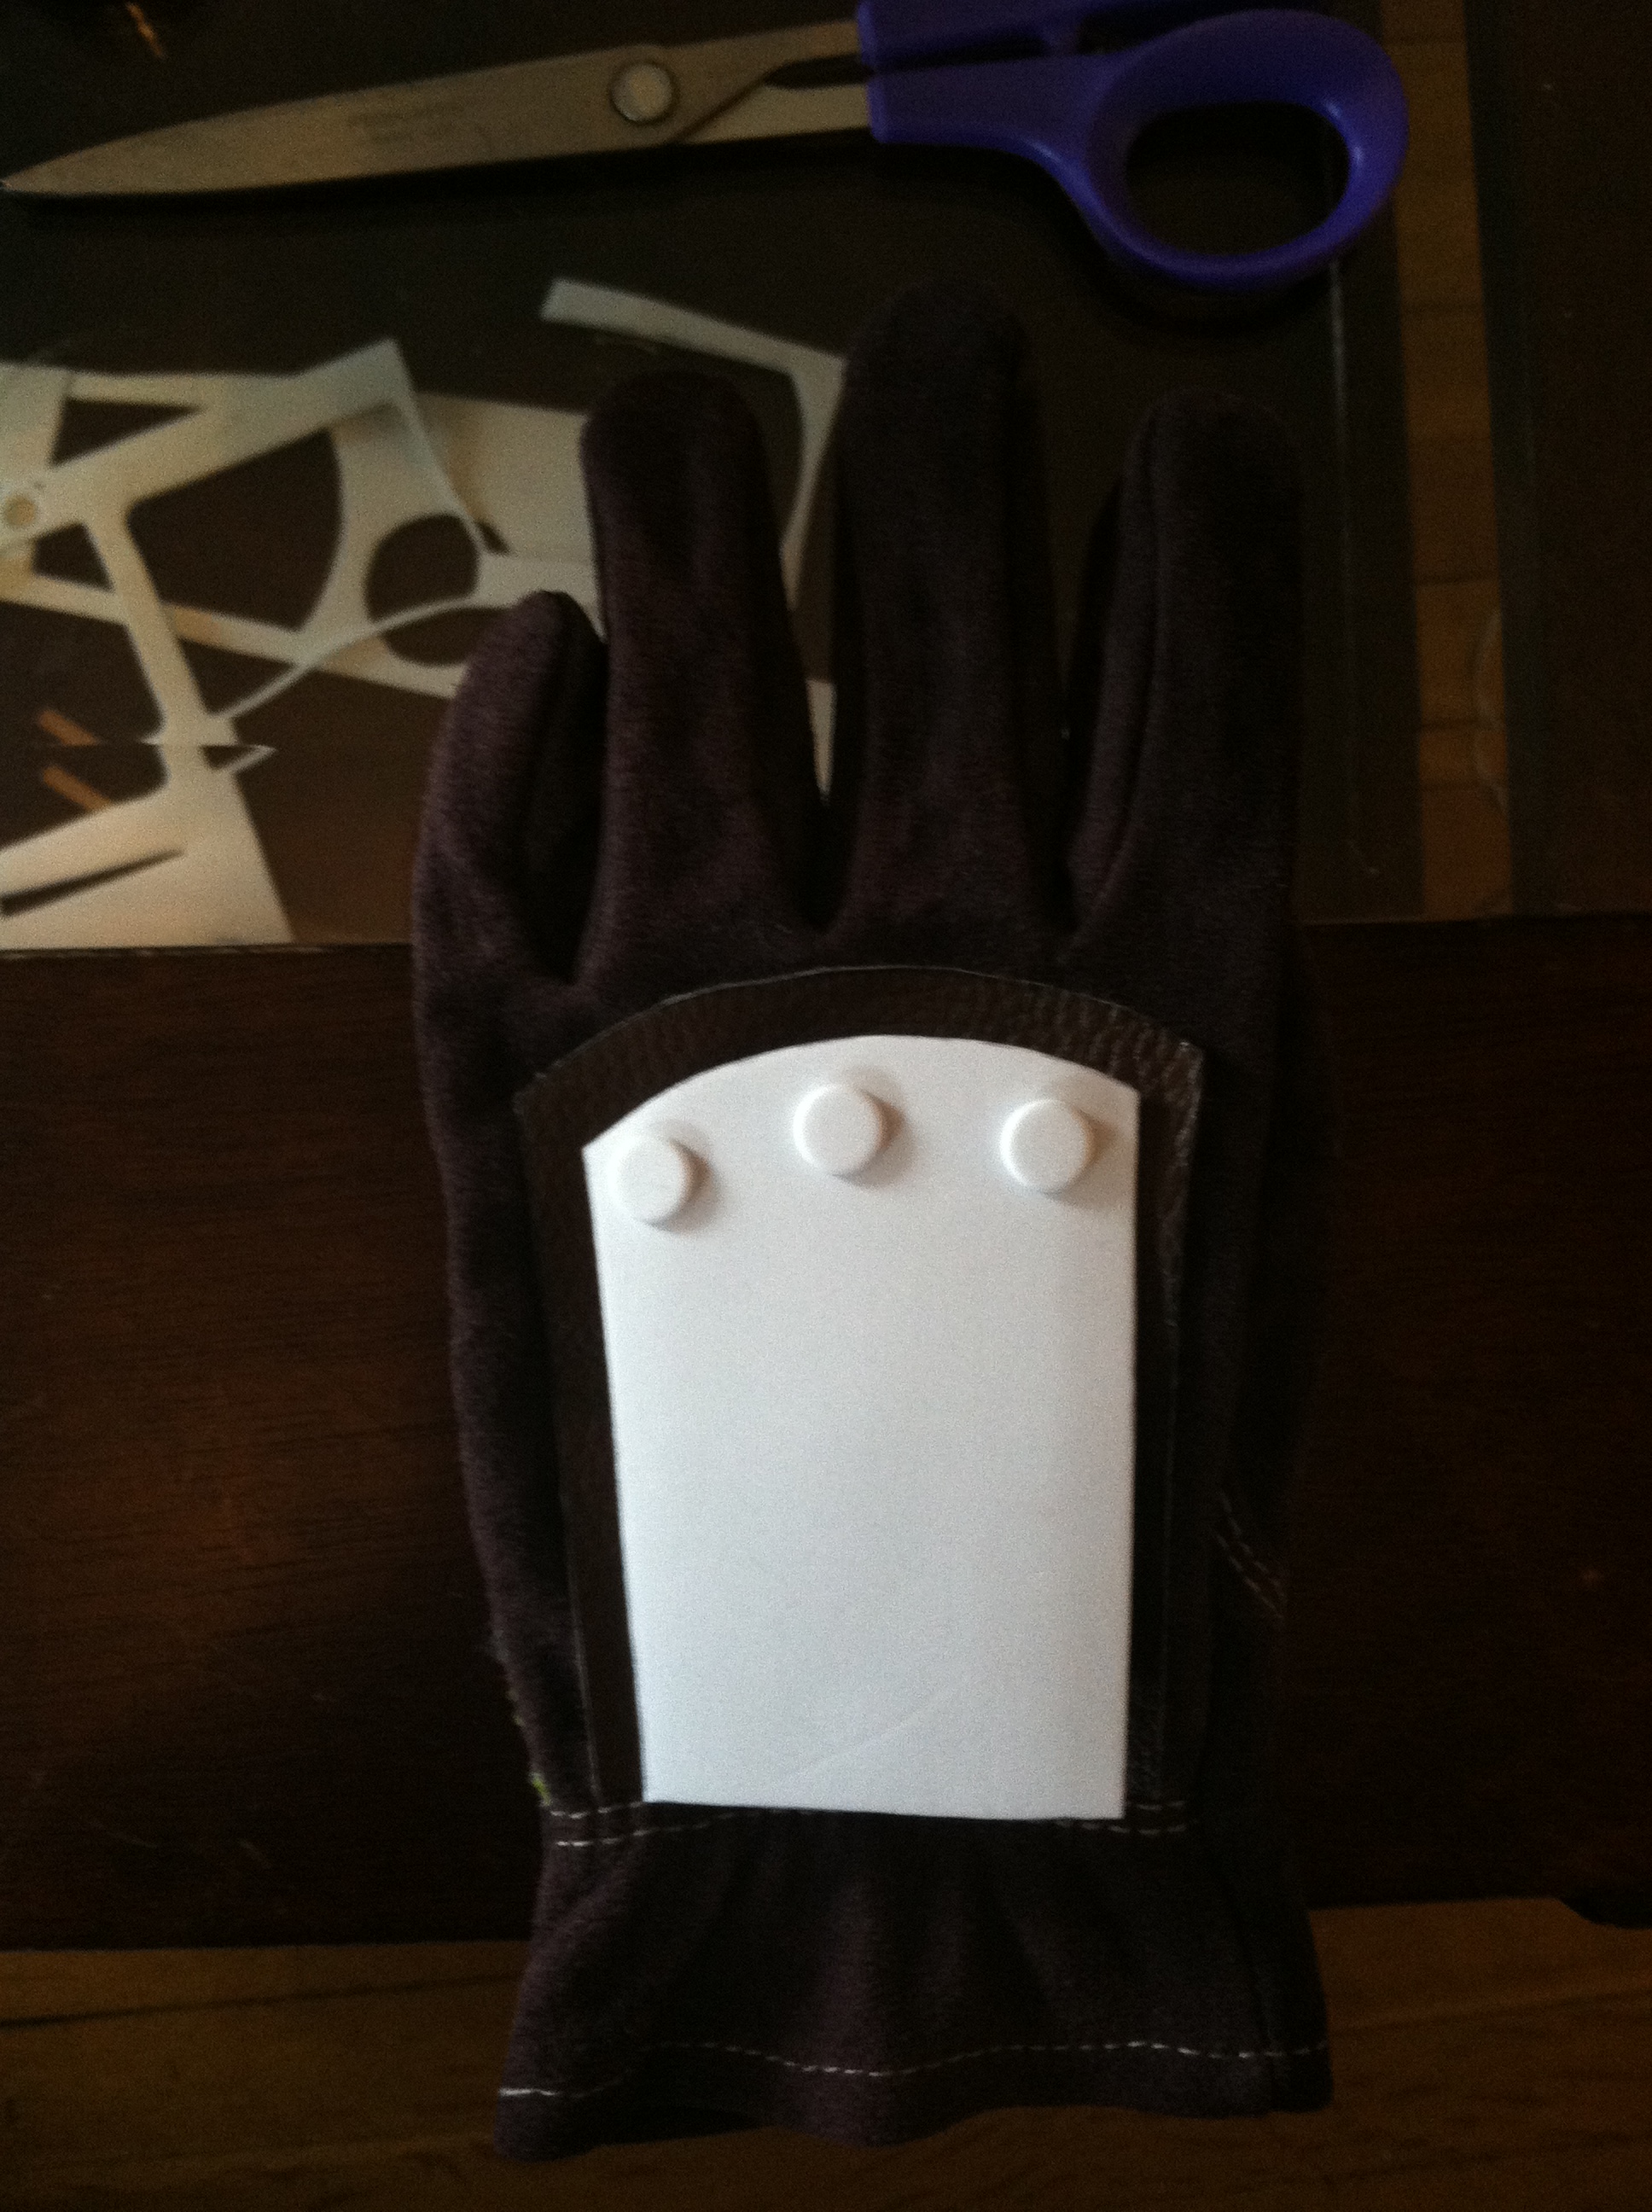
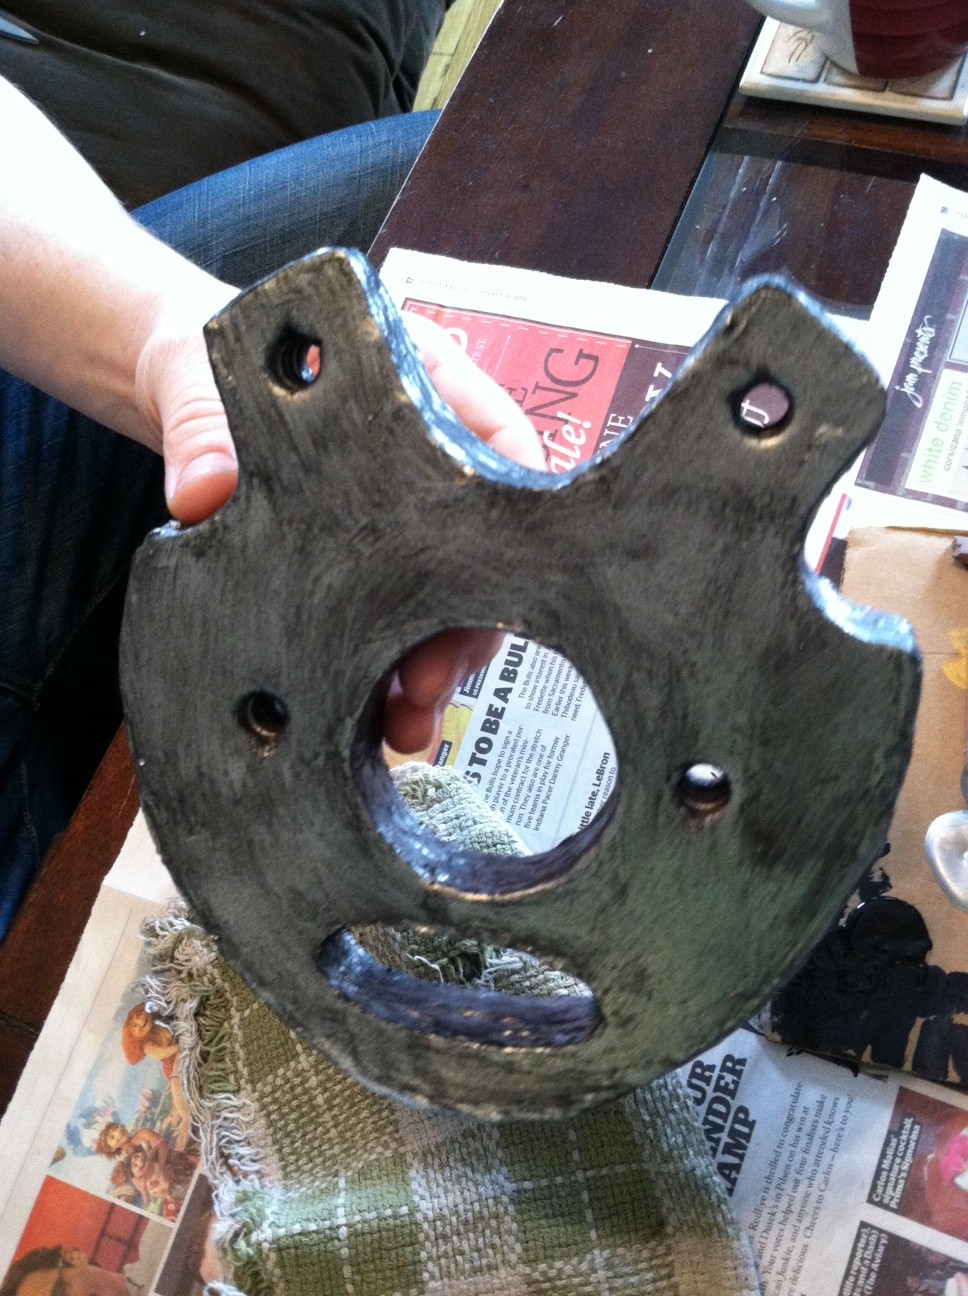
Next; the Plasmid control panel. The panel needed to be thick enough to house both the Plasmid port and one of our custom gauges so we cut the base out of  5 mm craft foam. The gauge was already constructed and ready to go from our work on Eleanor Lamb’s syringe, so we just cut out an opening in the foam to hold it in place and moved on to the Plasmid port. For the opening we used one of our plastic ports like we used on our helmets and then crafted the shutter out of 2 mm foam circles.

IMG_0716IMG_0717

IMG_0718

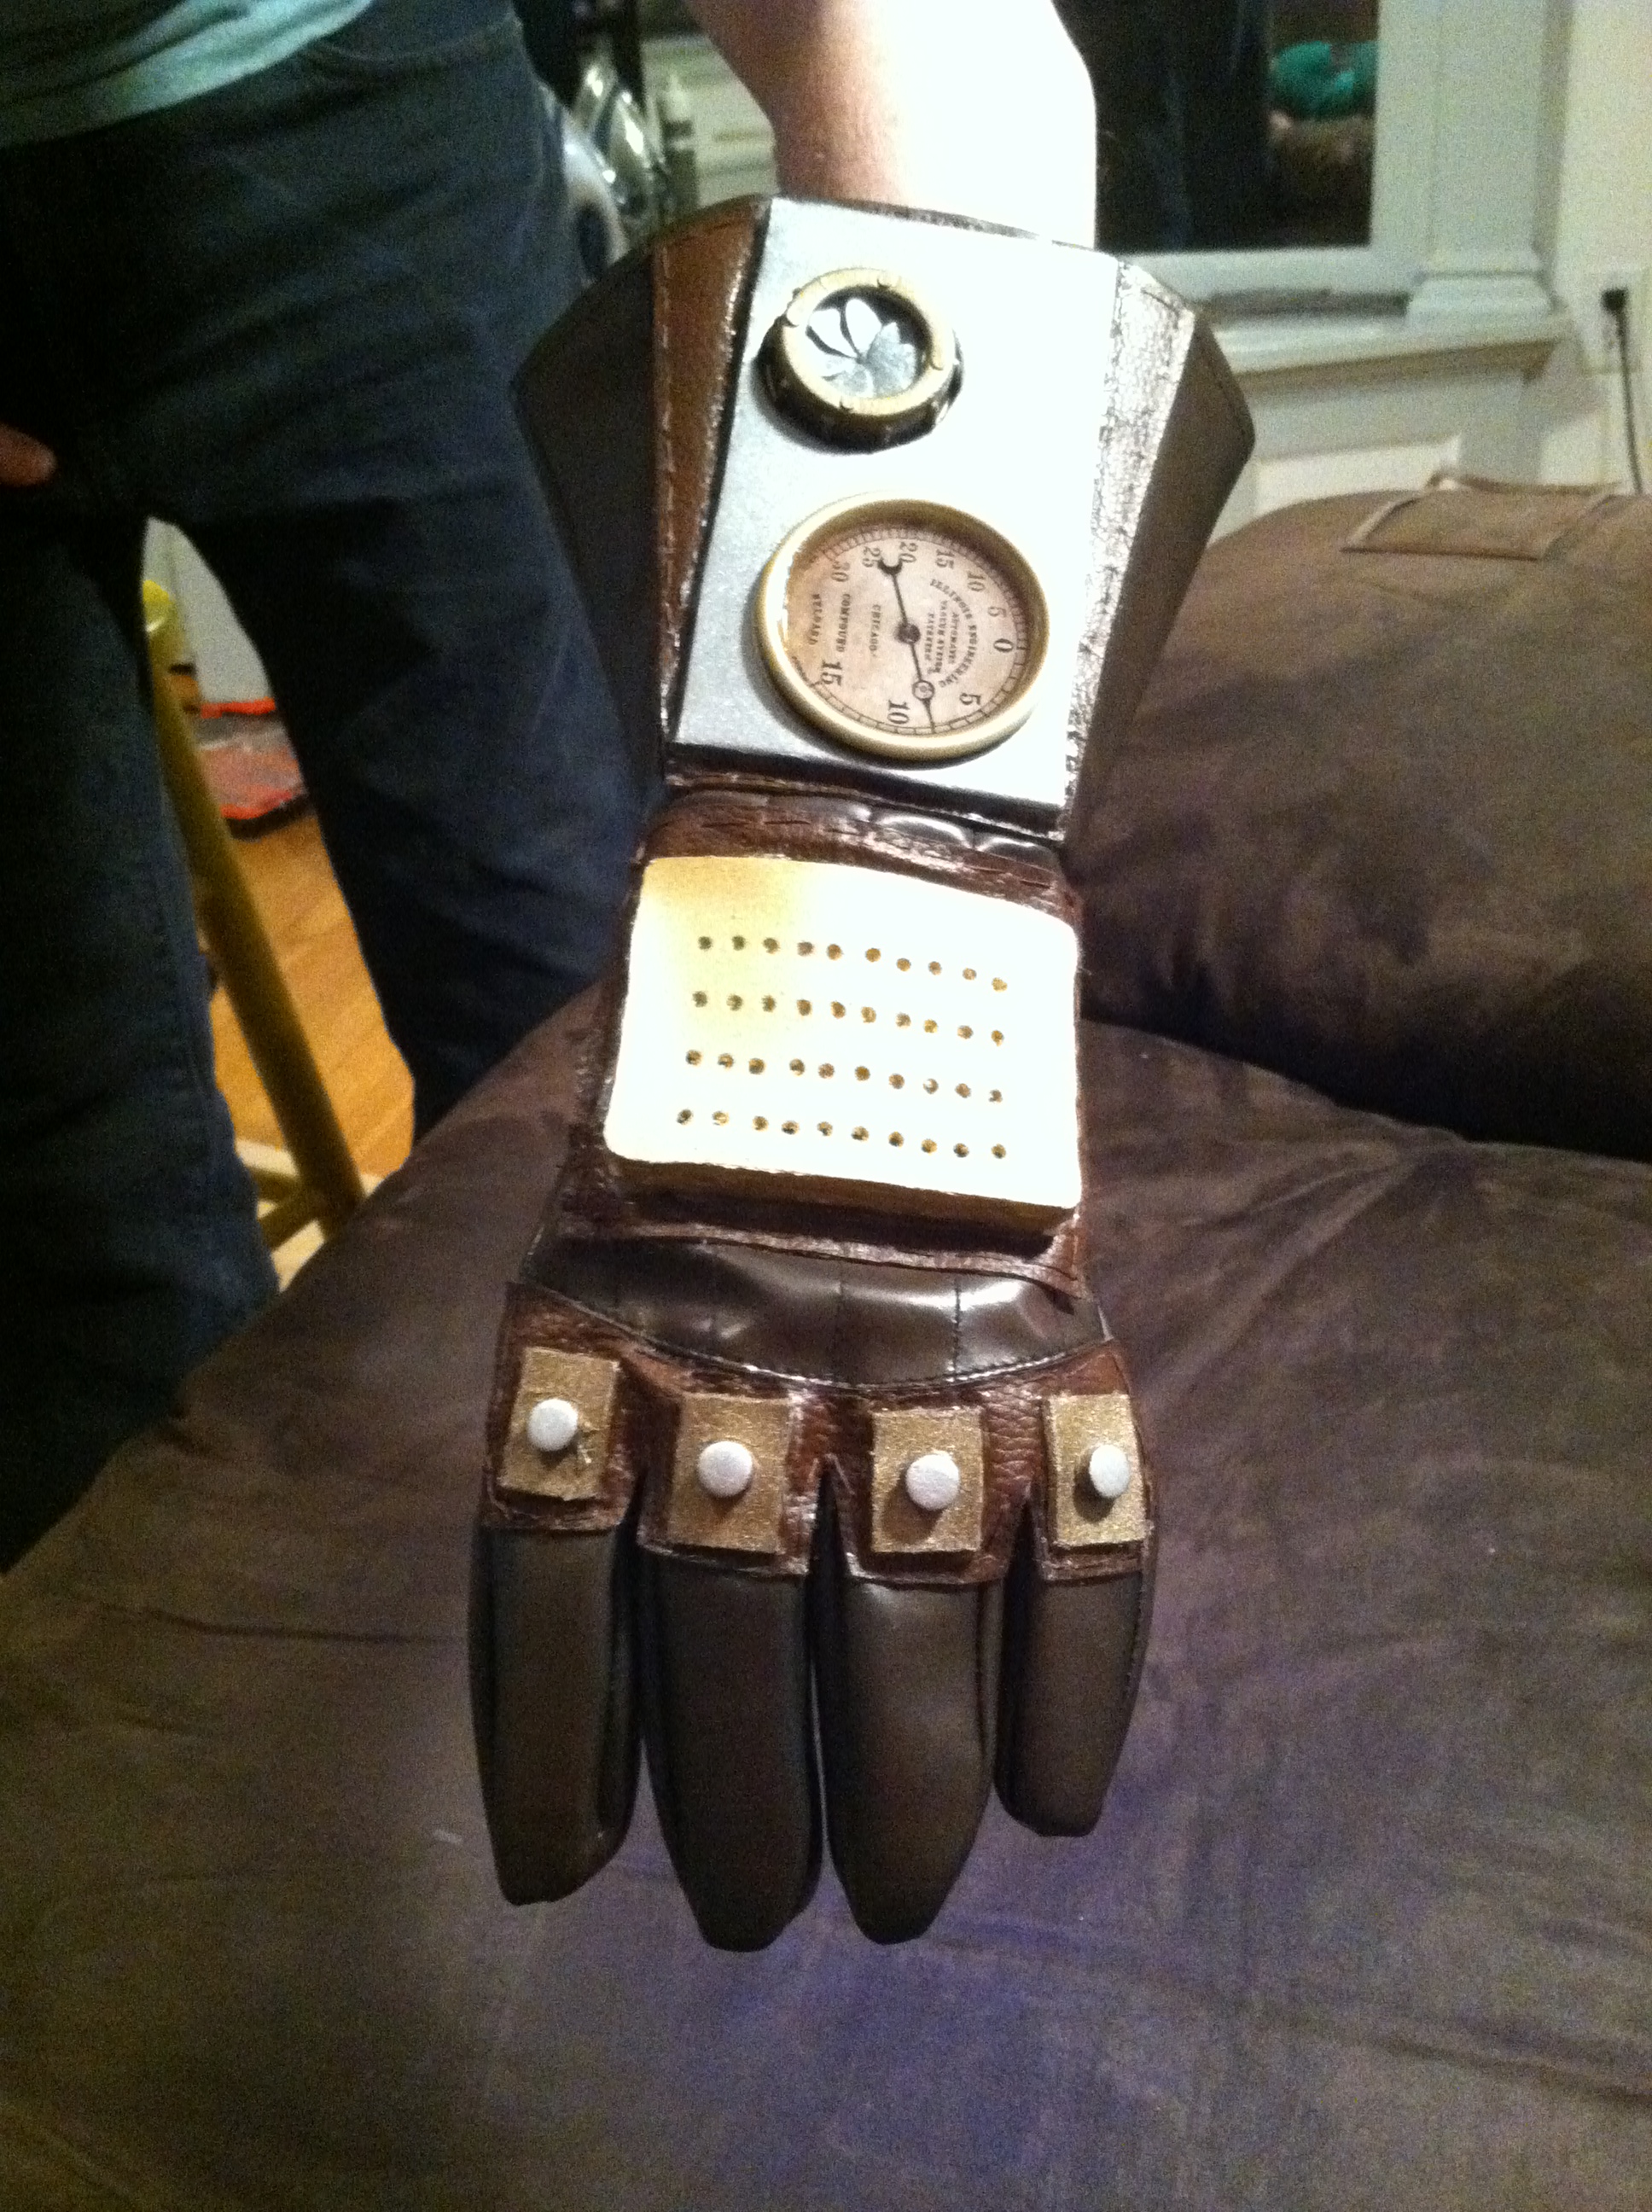
With the port constructed we cut another hole in the base beside the gauge. We then sealed the 5 mm panel with Elmer’s glue and painted it steel. The port was hand painted polished brass and the shutter steel. We hot glued the gauge and port into the panel and then attached the panel to its leather patch with Shoe Goop. Here’s a couple of shots of the glove at this stage.

IMG_0771Now for the first bit of real color… The Subject Delta symbol itself! Sara was so thrilled to finally be adding something other than a metal or earth tone to our cosplay. I started by cutting out a delta stencil from 2 mm foam. I laid the stencil in place and hand painted it with some teal acrylic paint.

delta symbolpainted delta

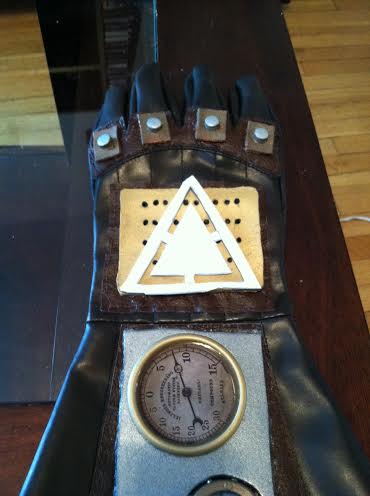
I then weathered the glove with some of our black acrylic paint and used an X-acto knife to lightly scrape away some of the teal to so our delta symbol didn’t look like it was painted on yesterday.

IMG_0938

With the back of the glove complete, lets take a look at the elements of the palm side of the glove. Now, this part actually came first, but I wanted to save it till last for effect.

For the Plasmid ports on the fingers and thumb we used a standard 3/4″ grommet kit from Home Depot. We followed the directions and used the metal hole punching tool to make the holes in the fingertips of the glove. We then fitted the grommets into the holes and snapped them into place. For the Plasmid port in the palm we used  another one of our plastic ports.

IMG_0713

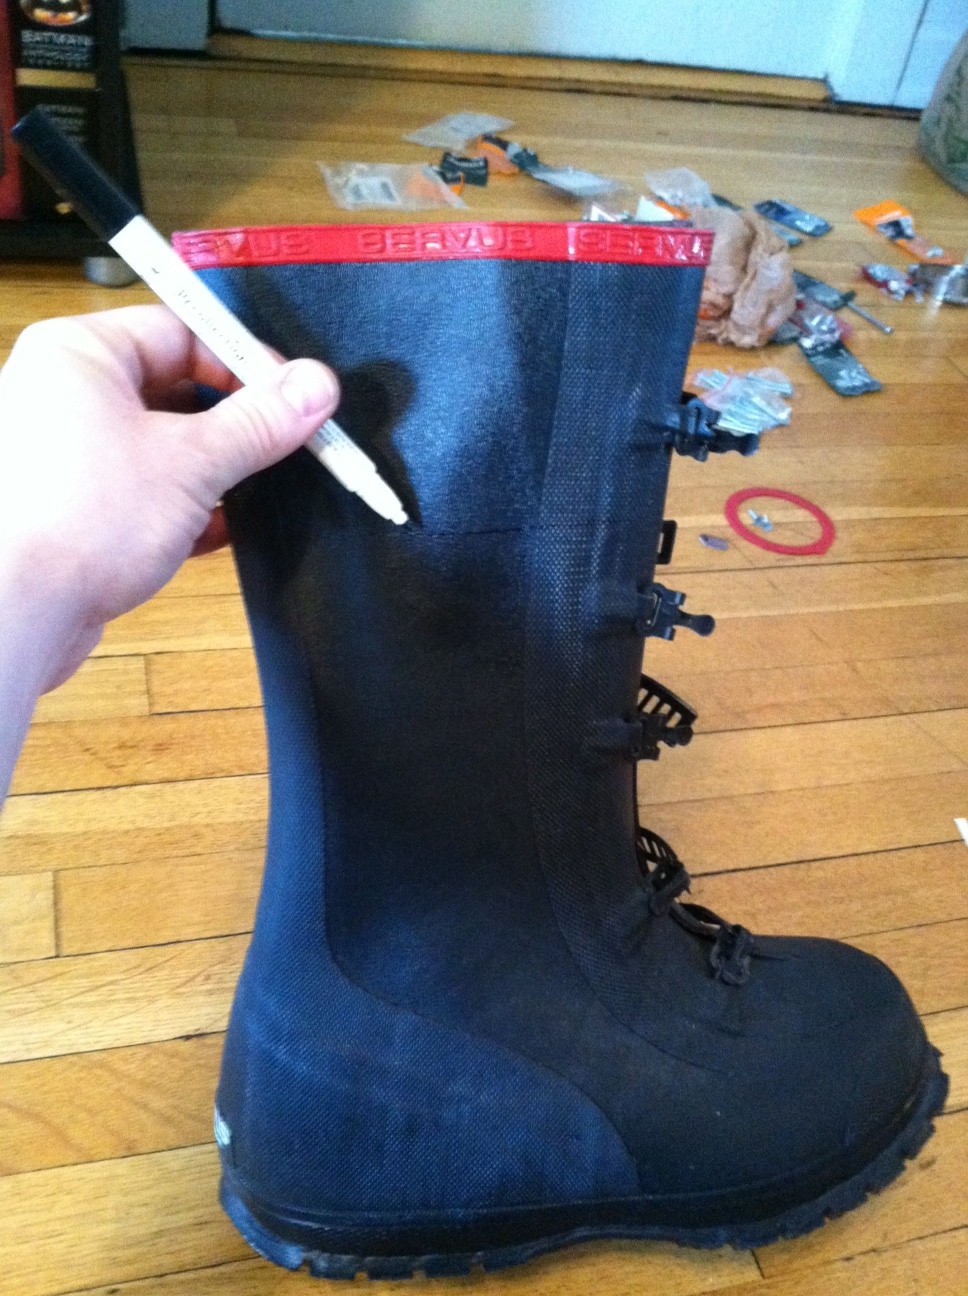
I used the port to determine the size of the hole that needed to be cut in the glove. Once the hole was cut I lined it up to see how it would fit.

IMG_0714 IMG_0715

As you can see, the port is a little too thick and sits up too far from the surface of the glove. So, I used my hand saw to cut it in half, but before I did, I drilled some holes around the edges so that I would have a way to sew the port to the glove.

IMG_0716

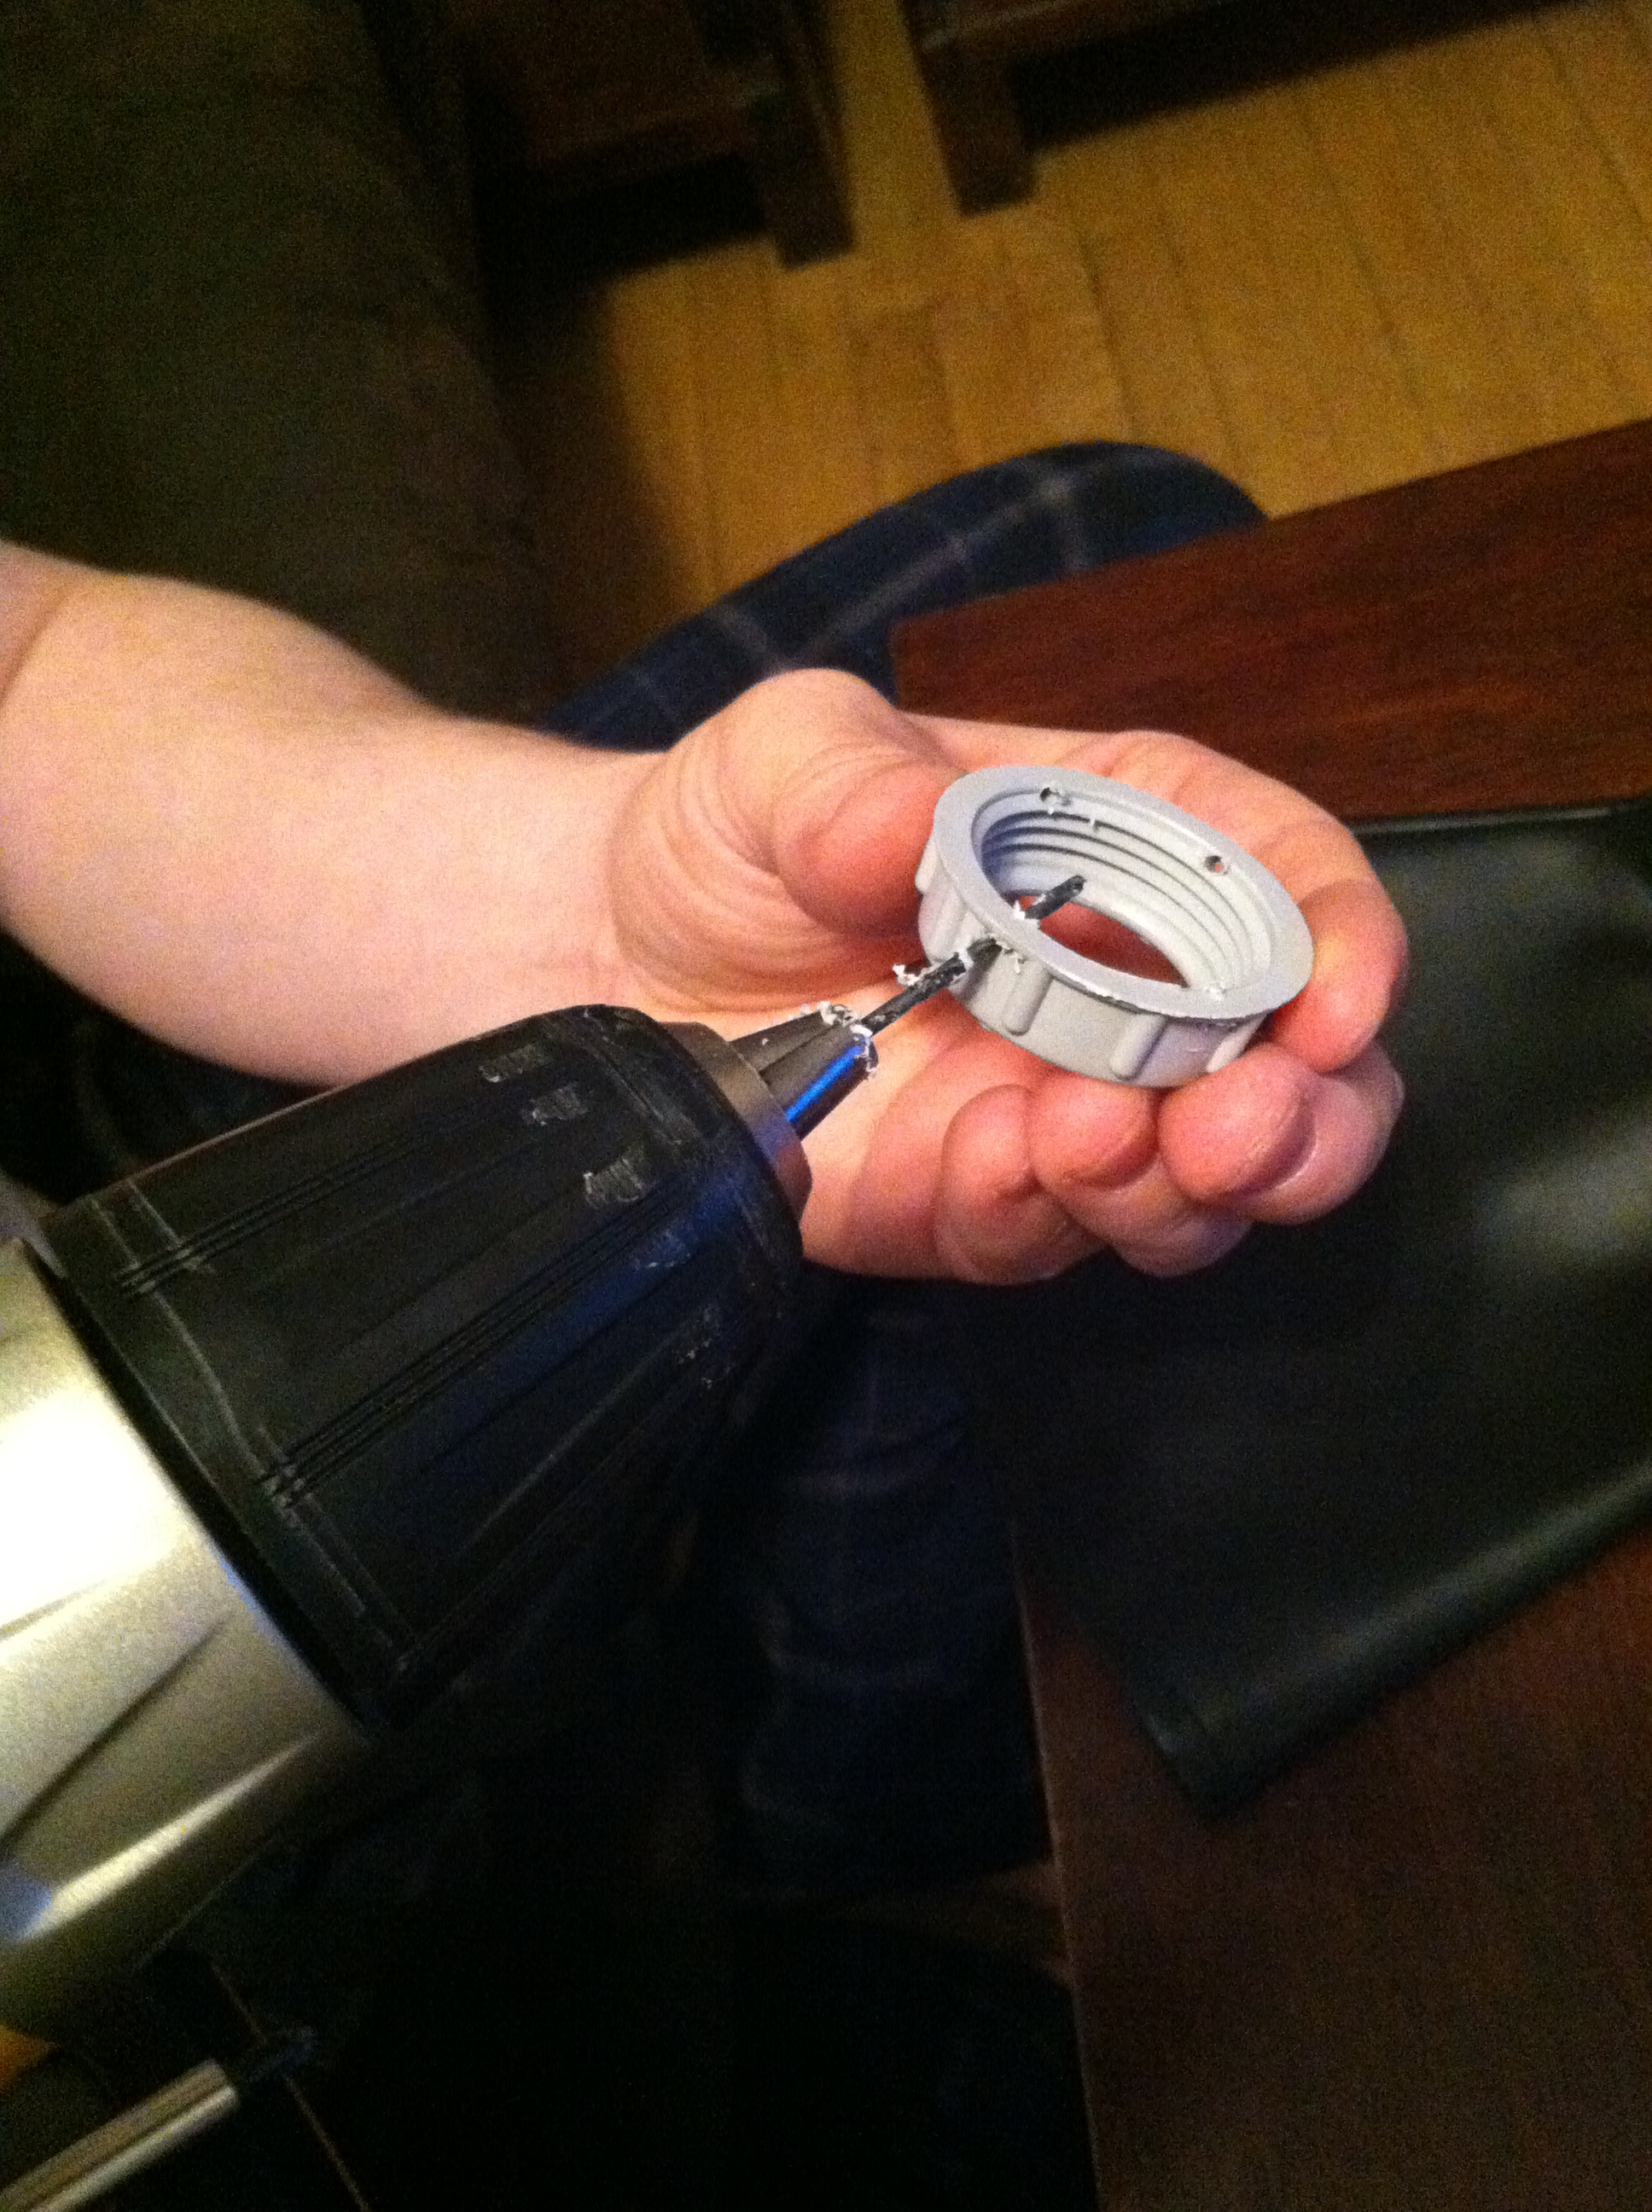
With the holes drilled and the port cut in half I spray painted the port with some of the polished brass and sewed it to the glove.

IMG_0658

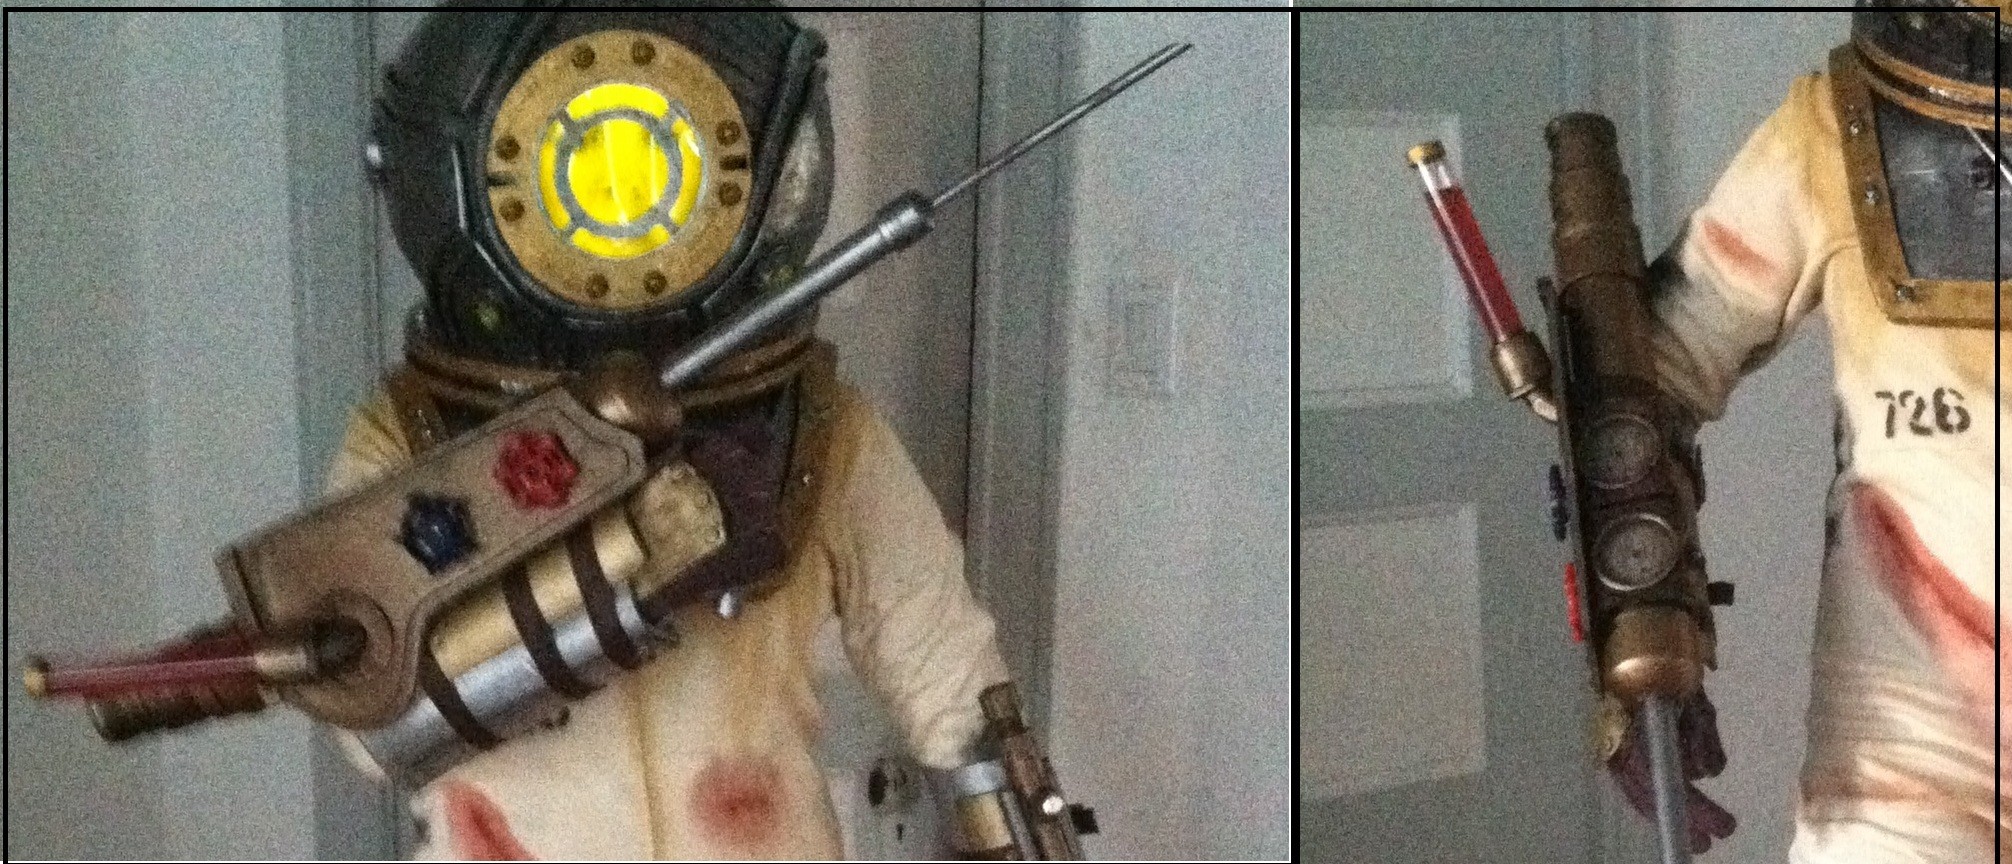
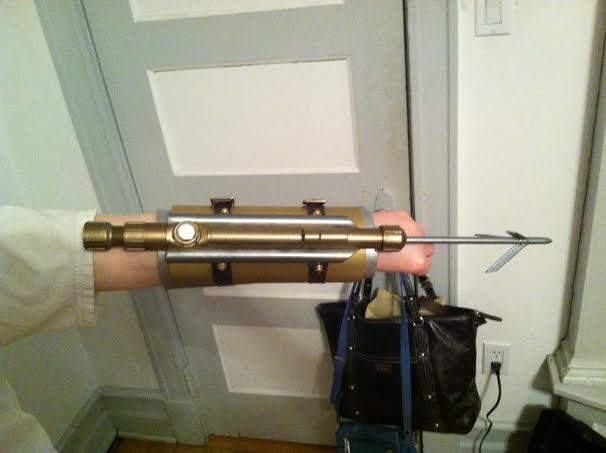
Last, but not least — it was time to add the lighting elements to simulate the Plasmid. As we discussed in the helmets post, we researched many processes and products that would allow us to incorporate lighting elements into our Cosplay. We even thought about trying to create our own custom circuit, but decided that was too advanced and time-consuming at this stage. So, we ultimately decided on party raver gloves. Blue to simulate Electro Bolt; my favorite Plasmid! The gloves were perfect because they already came rigged with separately lit fingertips and thumb and had three pulse setting to choose from. We purchased our glove from Blinkeez.

IMG_0610

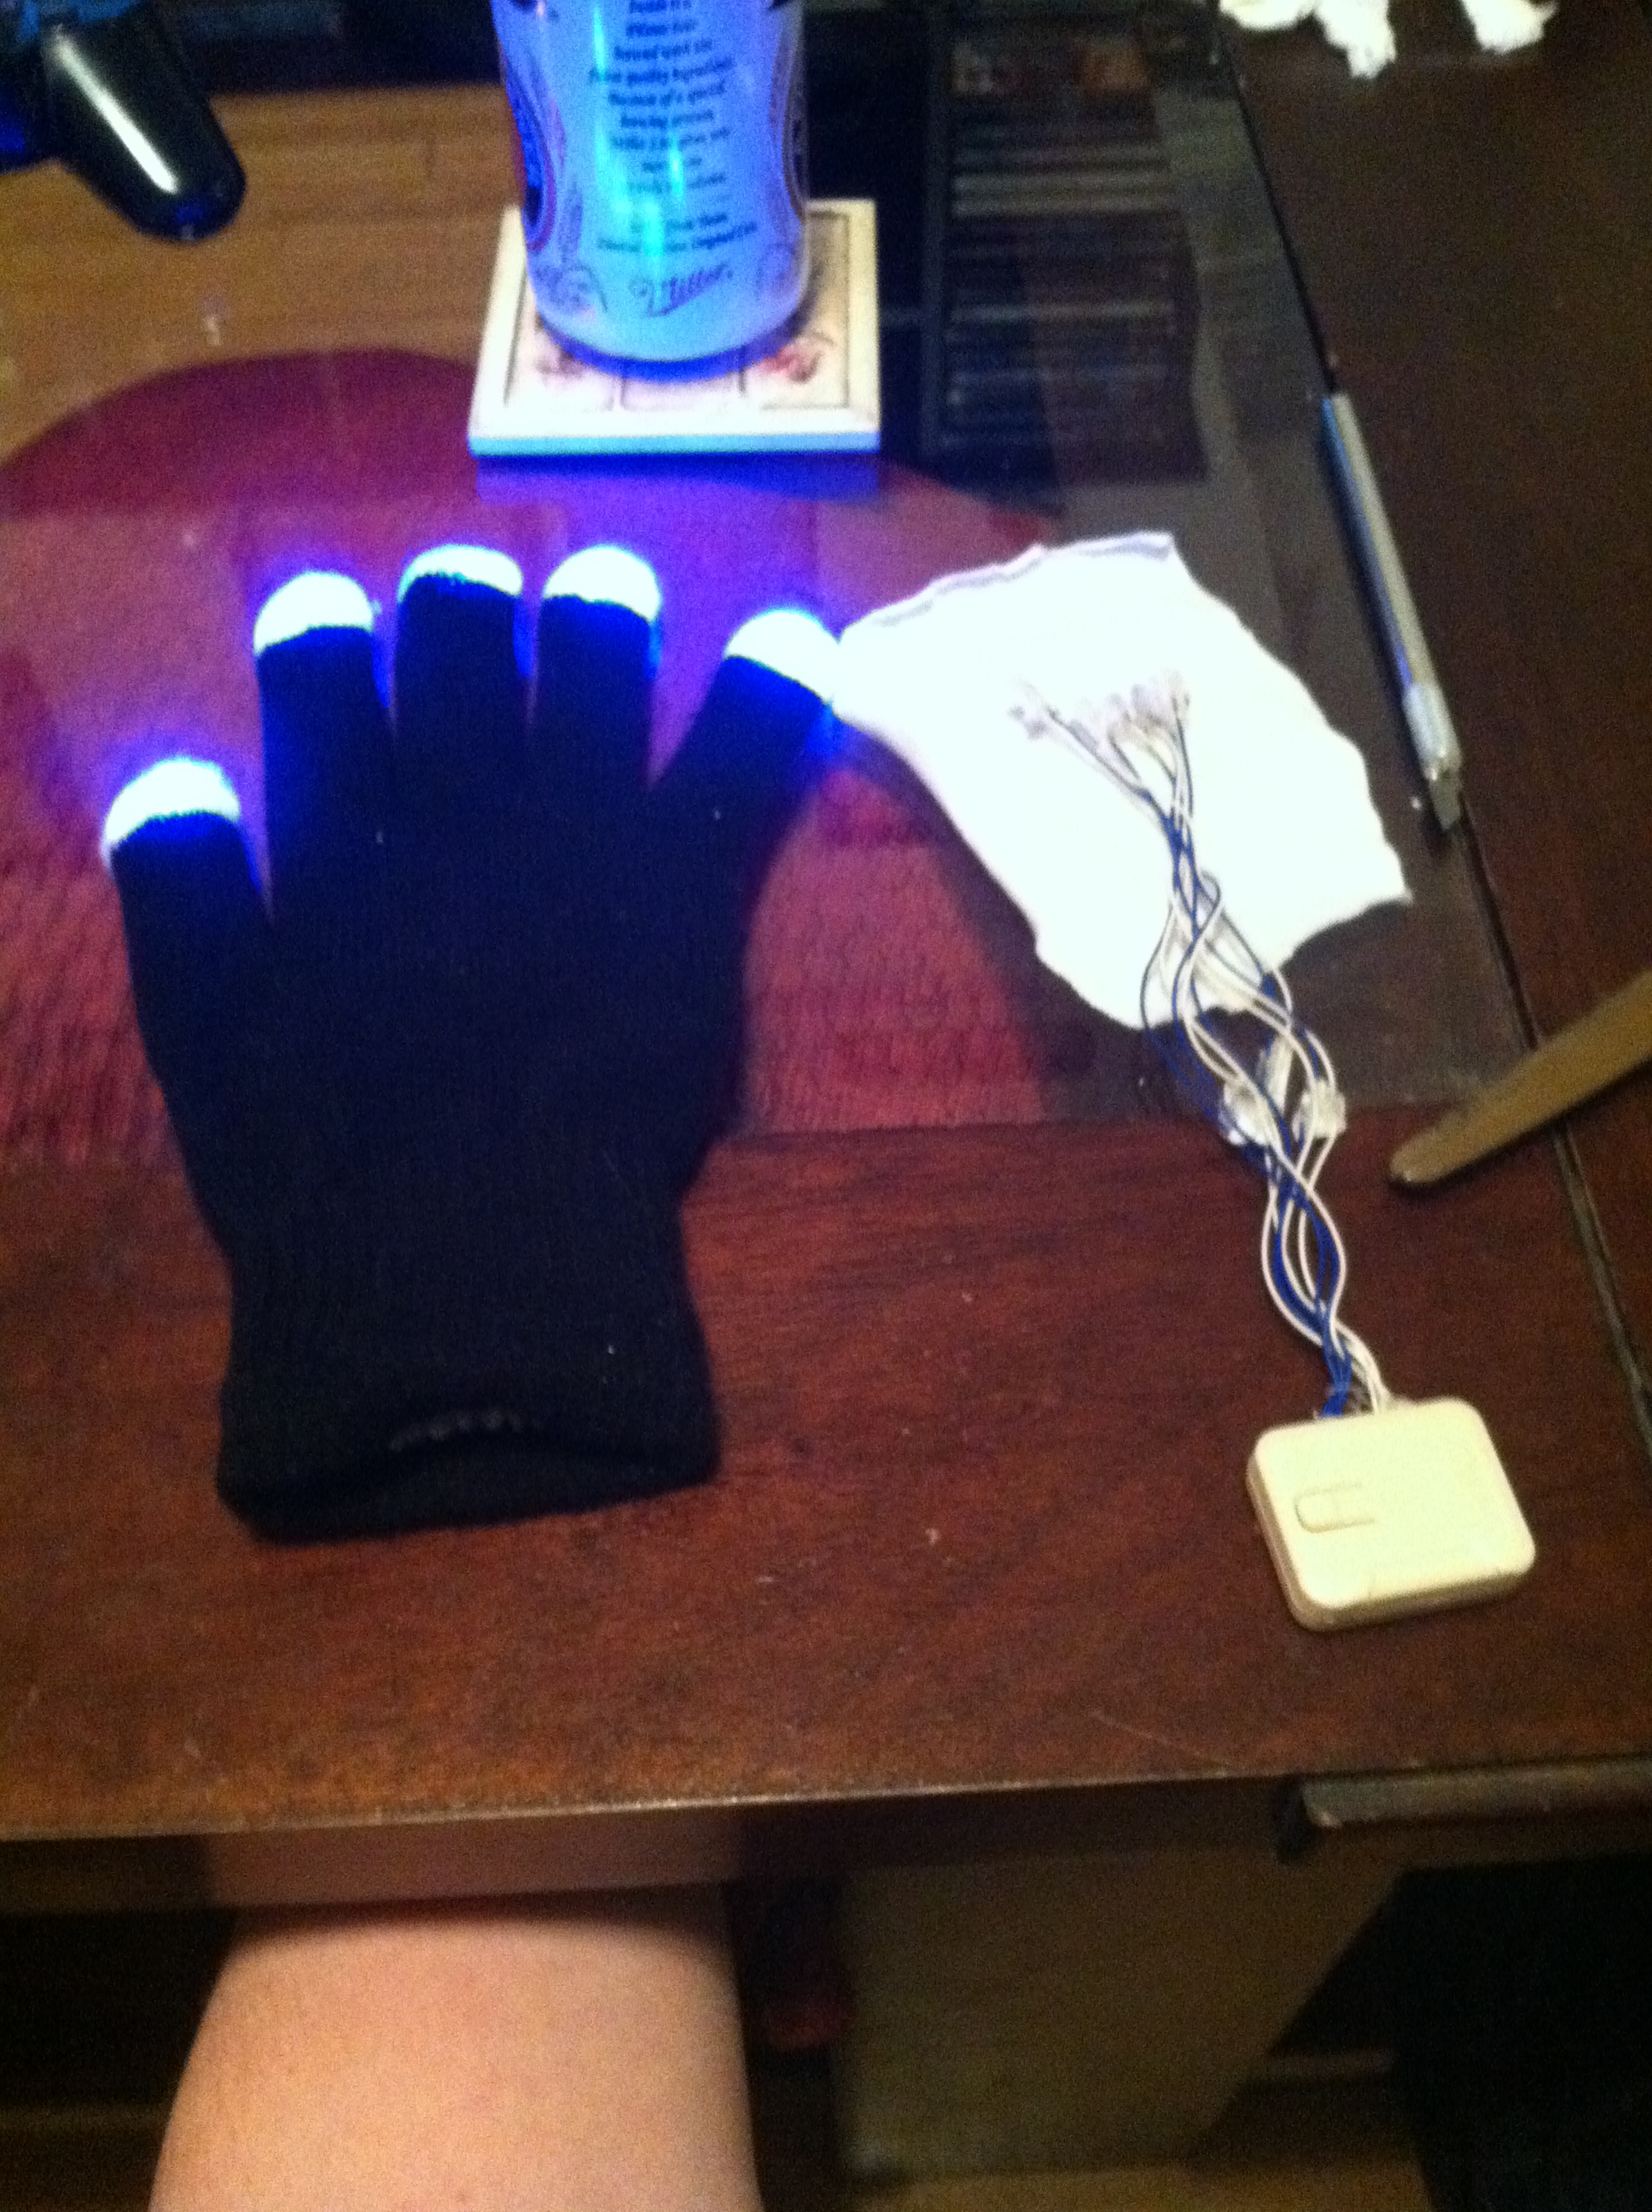
To rig up the light for the palm, we cannibalized the second glove from the set (since we only needed one) and hot glued the cluster of lights in place in the palm of the glove. The great thing about this is that we now had two separate power packs and circuits each of which could be set to a separate one of the three pulse settings to better simulate the Electro Bolt Plasmid and boyah! That looks so killer!!!

IMG_0611 IMG_0770


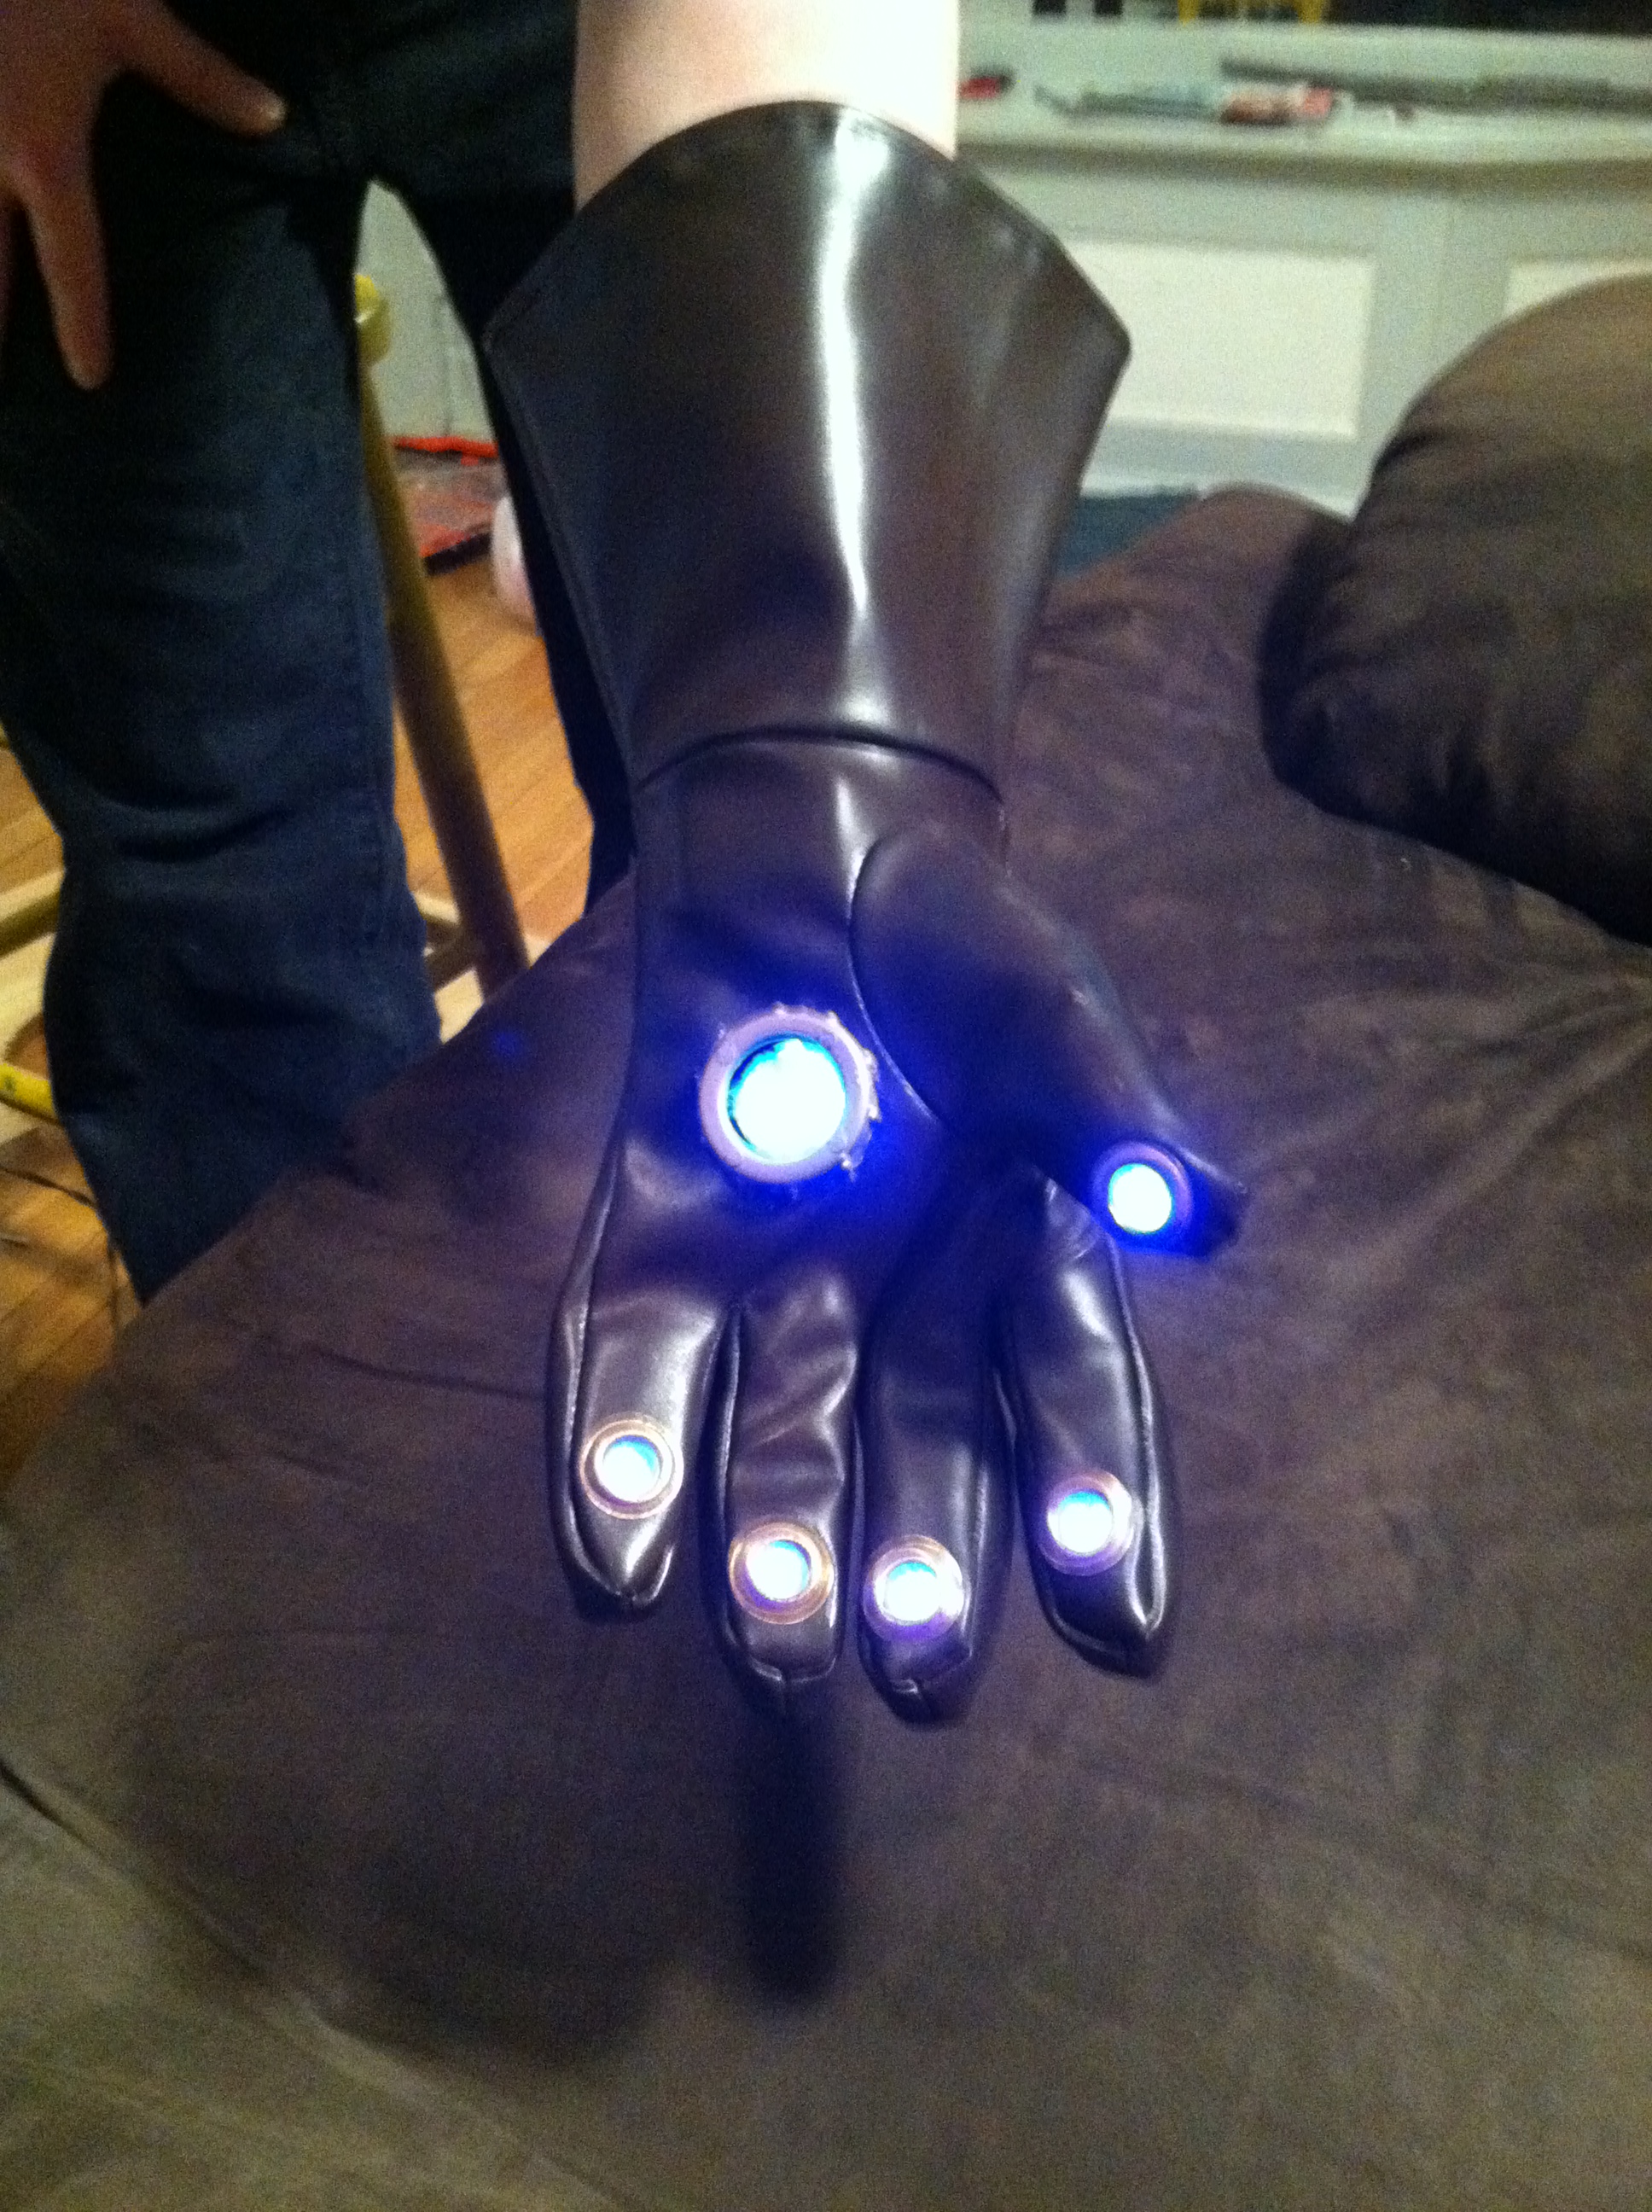
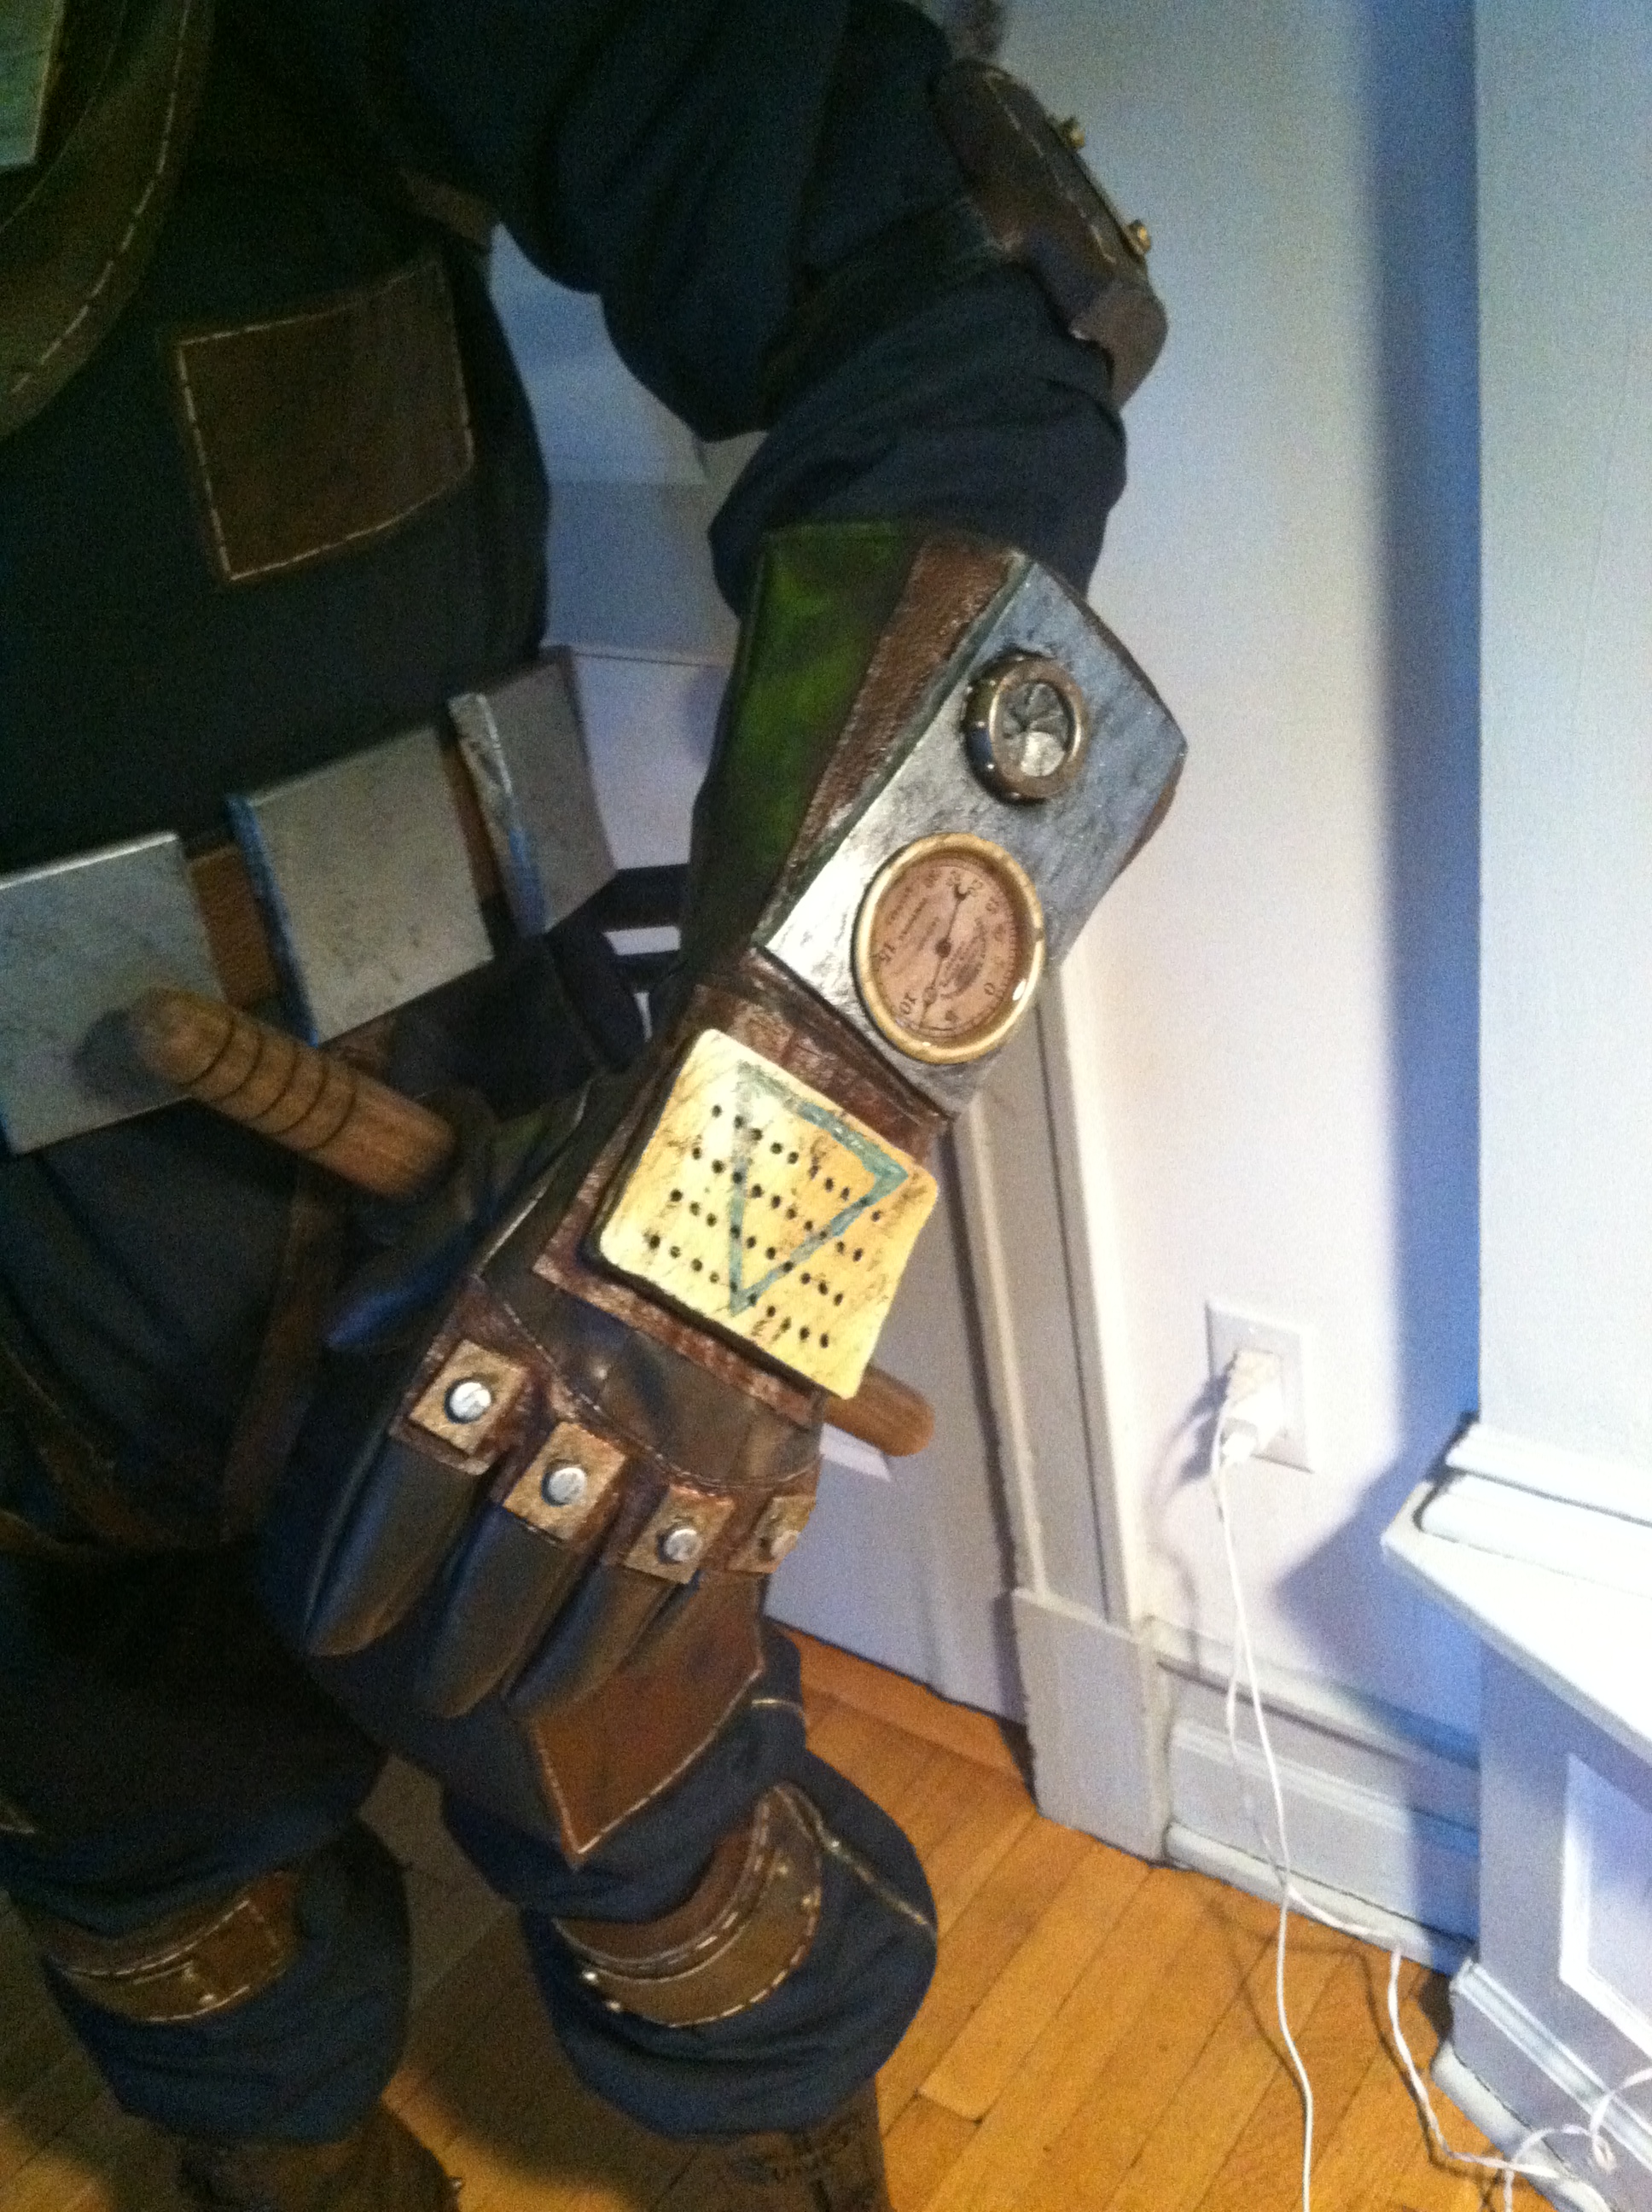
Here’s a couple of demos for you to feast your eyes on!


You can tell how long we actually were in the process by how unfinished Daniel’s costume was. Ha!

Thank you for following along as we built Subject Delta’s glove. The panel on the back of the glove was Sara’s favorite part of the cosplay, hands down! (See what we did there?) Hope you enjoyed seeing a little of the magic! — TCG


Level 4-5: Upgrade and Refine Weapon

24 Jun

Now that everything had been painted, we could move toward our finishing steps for Eleanor Lamb’s syringe. This particular piece had already gone through a revision stage where we agonized over the panel, built the panel, agonized some more and then built a whole new panel. Little did we know that there was one more hurdle to jump in building this gnarly prop. More on that later.

Eleanor Lamb with Helmet Concept Art


Before we could jump the unsuspected hurdle, we got to play with some resin! Check out the front view on the reference photo and you’ll notice the two gauges along the top of the syringe. At first, we thought we’d just have to purchase something that looked similar. It never occurred to us that we could actually build gauges until Daniel found this amazing tutorial on EPBOT, a blog all about fun, crafty, nerdy joy! She came up with a quick, easy and cheep way to make steam punk inspired gauges. We’ll show you our work as we followed her step-by-step instructions but you can find the tutorial for yourself here:

DIY Steampunk Gauges.

We started off with sliding closet door handles which you can buy at your local hardware store. The color we picked didn’t really matter as we planned to paint them before filling them with resin, which we did in our makeshift painting room, a.k.a. the kitchen.

sliding door handles pre-paint Gauge Backs Painted


Once the paint had dried, we could really have some fun. After all the months of papier-mâché and foam work it was very exciting to work with a different medium! Jen, the wonderful blogger who provided the process we used, put the gauge faces she used for her project up on her blog for others to print and use. So we did just that! We put the gauge faces into the sliding door handles and got our work space ready to go. Next came the epoxy resin.

Steam Punk Gauges Steam Punk Gauges Epoxy Resin Supplies

Easy Cast Clear Casting EpoxyWe purchased a basic kit from Michaels and followed the simple instructions that came with the kit without a hitch.  A word of advice, make sure that you have a disposable cup and stirring stick before you start. There’s nothing like getting all excited to play with a new process only to discover that you don’t have the containers and tools that you need. Using the two plastic cups we mixed together the epoxy and then poured it into the sliding door handles. There were bubbles, naturally. Using my hairdryer set on a low cool setting, I swept it across the surface of the gauges which worked out the bubbles. I made sure to take my time and sure enough, we got really clear gauges!

Steam Punk Gauges with Bubbles Steam Punk Gauges Gauges Resin Drying


We let it cure for 72 hours and I was amazed at how hard they were! I love learning new crafty things! Again, the instructions that come with the kit were very simple and easy to follow but just in case you prefer a video here is a tutorial for you. How to Use Easy Cast

Gauges for Eleanor Lamb's SyringeNow for the hurdle, how to mount flat gauges on the curved surface of our PVC syringe. At first, we thought we could just mount it in some 2 mm craft foam and then wrap the foam around the pipe. The foam would account for the gaps and once we covered the sides it would look like there was a raised portion on the syringe were the gauges were mounted. This did not work out as planned. It was time for us to get innovative.


We batted around some ideas and finally decided that we would need to carve a hole into the body of the syringe for the gauge to sit in. Since we had a freshly painted, beautiful syringe we were reluctant to do this without testing. So that’s what we did. We took a spare piece of the PVC and drilled into it with the proper sized auger bit and, as you can see from the image below, the gauge fits into place quite nicely.

Syringe washers cutArmed with the confidence that comes from testing, we started work on the actual syringe. We got everything set up and Daniel was ready to cut in to our beautiful syringe when it hit him. The thinner PVC pipe we used for the needle of the syringe extends through the entire body of the syringe for stability. If we cut into the body of the syringe, we would risk damaging it a ruining the whole piece. Plus, the PVC pipe would prevent the gauge from sitting fully down into the space. This meant that we were back at square one.

We would have to figure out a way to mount the gauge on top of the surface of the syringe. First, we removed the panel and added some spacers to the body of the syringe. Daniel used a hand saw to cut them in half so that the panel would be raised and we could run leather strips around the syringe. In the whole trial and error process, we also decided that the leather detailing was more accurate than the foam. Daniel then cut some brackets out of 5 mm craft foam to help “square up” the round surface. The brackets also served to close the gaps on either side of the gauge and give the effect of a raised panel that housed the gauges. We used two strips of hand detailed leather straps and put the gauges into them. Then we put it all together.

Eleanor Lamb Syringe Bioshock Cosplay Eleanor Lamb Syringe Bioshock Cosplay


All that was left to do was put the panel back on, take care of any touch-ups to the paint job, weather it using the technique out lined in our Weathered Metal Effect Tutorial and add the ADAM tube which we purchased from Scrapbook.com and then filled with red body wash, pomegranate scented for anyone who’s curious. And with that hurdle behind us, we had finally completed Eleanor Lamb’s syringe!

Eleanor Lamb's Syringe Bioshock Cosplay


Between the posts for the harpoon and the posts about the syringe, you might have noticed that we haven’t mentioned the gloves yet. Well here’s your bonus tidbit! We found a pair of gardening gloves that were a light-colored leather and then dyed them. We used Rit dark brown dye. First, I soaked the gloves in water until they were saturated. Next, I mixed up the dye and put the gloves in. I stirred them several times to ensure that the dye was taking evenly. Since the original color of the gloves was so light it took about 45 minutes to get them the shade that I wanted.

Dying Gloves Dyed Gloves

Once they dried, Daniel whipped up the metal plates for the top of the gloves. He cut the shape and the “rivets” out of 2 mm craft foam, sealed it with Elmer’s glue and then hit with some gold spray paint. Using Shoe Goo, he glued it to the glove and let it cure for 24 hours.

Cosplay Plated Gloves Cosplay Painted Gloves

Then we weathered the plates and gloves and now we’ve completed all of Eleanor Lamb’s “arm gear.” If you haven’t checked out the posts about the harpoon, which includes the arm guards, you can find them here! Thank you for following along! If you’re interested in more immediate doses of Those Crazy Gilberts, hit up or Facebook page: Co-Op Campaign Cosplay! — TCG


Level 4:4 – Stabilize Ranged Weapon

13 Jun

Eleanor Lamb's Harpoon

When last we spoke about Eleanor Lamb‘s harpoon, we’d finished the initial construction and were gearing up to paint.

For the harpoon we used gold for the base, silver for the harpoon itself and the side tubes and then brass for the body and scope of the piece. We hit it with several layers of Shellac first and then, once that was good and dry, we used Rust-Oleum brand spray paint to add some color. Daniel worked in phases for this. First he did the copper, then the gold for the base and then the silver. Due to all the tape we had to use between each application, there was quite a bit of touch up to do. For the touch ups, we hand painted with some acrylic paint. It wasn’t a perfect match but, knowing that we planned to distress it, I beat my rampaging perfectionism into submission. If you’re interested in reading more about our spray-painting in mid-winter saga, you can do so here.

Eleanor Lamb's Harpoon Top View

After having spent such a long time looking at our cosplay in multiple colors of foam and plain ol’ PVC pipe, it was magical to see it in it’s intended color.

We used some more of the hand-detailed straps mentioned in our posts about Subject Delta’s suit to secure it to my arm. We decided to use functional buckles and straps for authenticity, not taking into account how difficult this might be to change in and out of. More on that at a later date. We selected some copper-colored screws so that we could keep up the metallic motif.

The first time that I tried on the finished harpoon, with the bolts from the strap screws poking my arm, I realized that I might need some sort of cushioning between my arm and the stabby bits of the prop. So I whipped up some foam arm guards out of 5mm craft foam.

Arm Preparing to PaintSadly, I didn’t take any pictures of foam before it cut it and this was a hasty bit of foam crafting to say the least. I simply measured my forearm at the thickest part for width and my forearm from the wrist to the elbow for the length. Then, using those measurements, I cut a square out of 5 mm craft foam. Since I was working with a simple square, there was unsightly, uneven overlap as I wrapped it around my forearm. I could have that, so I whipped up a piece of 2 mm foam that would look like a bolted on plate to cover the seam. Here it is before painting. You can see that I’ve rounded the edges as well as cut out little “bolts” from 5 mm foam for some visual interest. Also pictured is the acrylic paint I used to paint the piece.

Once I had it all painted and hot glued together I added two long strips of Velcro, one to the edge of the large 5 mm craft foam square and the other to the 2 mm thick plate. I secured the Velcro with hot glue. We’ve pulled up the edges here so you can see how we’ve got this set up.

Arm seam

In the picture above, you can see the faint outline of the base of the harpoon pushed into the foam. The snug fit of the harpoon base kept it steady while on my arm. However, after several days of taking the arm guards off and on, the hot glue holding the Velcro started to go so I reapplied the hot glue and then tacked the corners and middles of the Velcro into place with a needle and thread. Who says you can only stitch cloth?!

The final step in crafting Eleanor Lamb’s harpoon was the weathering. We used black acrylic paint and the process outlined in our Weathered Metal Tutorial on both the harpoon itself and the arm guards. We didn’t get a great picture of the harpoon before and after weathering but we do have a great one of the arm guards for you to check out. The arm guard on the left hasn’t been weathered yet while the arm guard on the right has been weathered.

Weathered Arm Guard Top Weathered Arm Guards Bottom

And here’s our finished product!

Eleanor Lamb Cosplay Harpoon Pic

Thanks for checking out our posts on Eleanor Lamb’s harpoon even though we didn’t have a lot of pictures this time around. Can’t tell you how excited we are to finish up some of the pieces of our Cosplay, we hope you’ll check out some of the other posts as well! — TCG

Level 7:2 – Upgrade Footwear

13 Jun

Eleanor Lamb Back of Boots

Last time, on Co-Op Campaign, we had assembled Eleanor Lamb‘s boots. Just as a reminder, when talking about her boots were also talking about leg braces and knee pads. This will be a pretty brief post since were only dealing with the final steps in the crafting of this particular element. Yay!

Daniel did a quick paint job by taping off the cloth parts of the boots and spray painting the soles and tops with Antique Brass spray paint. If you’re interested in the painting saga, you can check it out here. Once they were dry we had a fine-looking pair of metallic shoes. Now it was time to add some details.


Eleanor Lamb Boot referenceFirst up, we needed to add the last of the gazillion leather straps.  Luckily these were not going to be functional straps so we could just slap them on and only worry about the aesthetic. According to the reference photo, we needed three straps but when we started laying them out on our boot, it looked a little excessive so we decided on two straps.

Boot with Strap Close

Eleanor Lamb Boot DetailFor Eleanor’s boots, we decided to use some upholstery tacks to both secure the leather straps and complete the bolt detailing you can see in the reference. Since the soles of the boots were so darn thick, just like the washers for the leg braces, we could just tap those tacks directly into the shoe.

Lastly, as with all the other pieces of this cosplay, we weathered it using the technique described in our Weathered Metal Tutorial which you can check out here.

Now that the piece is complete, let’s discuss the actual process of putting them on.

Eleanor Lamb's Boot Weathered Boot Covers

We’re working with two separate pieces, the boot with the leg brace and attached knee pad and then the boot covers with all the functional buckles. Because of the way that the knee pads are attached to the bars and the way that the straps from the boot covers have to go out and around the bars, I realized that there was no way I could easily put them on myself.

I wish we had captured this on film but let me try to describe the process of putting on the boots. Before I even put the boots on, we ensured that the bars were rotated forward toward the toe of the shoe and, as I tugged the boots on, we made sure that I didn’t bend the plastic bars or twist them in such a way as to pull the bolts from the shoes.

Once I had them on, we put the leather tongue in place and, as I stood, I held the boot cover up to my calf, all the while trying to keep my leg as straight as possible while Daniel, kneeling in front of me, pulled the leather straps out and around the bars to buckle and tighten them.

Then, once the buckles were fastened, I had to straighten up while Daniel Velcro’d the knee pads shut behind my knee. Quite a production if I do say so myself. But the great thing about having those bars attached functionally to my knee was how it effected my movement. It forced me into this incredibly accurate lumbering walk. The only problem with that is when the cosplay contest stage has narrow stairs to climb to get to the stage!

 Eleanor Lamb's Boots Before and After

Thanks for following along as we finish up yet another element’s worth of blog posts! Any feedback or suggestions for how we might have executed this better or just want to tell us how awesome it looks? Leave us a comment! — TCG


Side Quest Unlocked: Apply Color

12 Jun

IMG_0727Paint!!!

Finally, finally, FINALLY – we got to paint!!!

That meant we were so close to completing our first Cosplay project!!!

Ideally, we would have liked to have built our pieces and then painted them as we went. However, we didn’t (and still don’t)  have a dedicated work space which made that a little hard. Plus, we waited a little too long and, when the time came to paint a few pieces, the weather had turned. So in an attempt to wait it out, we kept building and planned to paint everything at once. With no more building to do, it was time to put some color on ‘em! Time to transform them from foam and paper into convincing, hard metal objects.

We had two options when it came to painting. We could hand paint everything in the relative comfort of our apartment or spray paint our pieces in one of the common areas of our apartment building.

Hand painting would have let us paint whenever we liked as long as we laid something down to catch the paint and opened the windows with fans for ventilation. However, we thought it would have taken a long time to paint everything; especially if we wanted nice, smooth, streak-free finishes. I figured spray painting would eliminate that concern. Plus, I’d had more experience with a spray can. So, we chose to do the majority of work with spray paint but for some detail work, touch-ups and distressing done by hand.

Now, the first problem with spray painting in Chicago is that it’s illegal to sell spray paint within the city limits. We’d only been living in the city for three years at this point and who would have guessed that this was an actual law!? It exists to combat graffiti and tagging within the city; but, if you’ve ever spent a day in Chicago… lots and lots of graffiti… So the only thing this stupid law really does, it make it very difficult and annoying to procure spray paint. The nearest place for us to get some was at a  Home Depot on the border of Chicago inside Evanston’s city limits. That’s a 45 minute train ride, plus a 25 minute bus ride… Through out the course of the this project I had to make three separate trips to the suburbs for paint.

Oh well. On our first trip, we made the trek and the paints we decided to use were: Antique Brass for the base tone of the brass pieces, an Antique gold for the highlights on the brass pieces, Dark Steel for the steel pieces, and a Leather Brown for painting some of the rubber pieces to appear leather. “What about the primer,” you ask? Well, as much as I would have liked to have given everything a nice primer base coat we were very limited on time and I didn’t want to have to do any more spraying of harsh chemicals then need be in an apartment complex. So, we decided to skip it.

Paint in hand, it was time to… well, paint. Wouldn’t you know it? This was one of the harshest winters in recent US history and Chicago was hit pretty hard. Ever heard of a Polar Vortex? Here we were, well into March, and the temperatures were still right at or just below freezing. With C2E2 just around the corner we had to paint or we risked not having the costumes ready in time. So we decided to do the worst thing imaginable… spray paint indoors.

I know, I know… don’t get me started. We all know how this ends.

Spray Painting Inside?We decided to set up a small, make-shift painting room in the kitchen. We laid painting tarps on the floor, hung some from the walls, opened the kitchen window, and used a floor fan for ventilation. Surely, this would be sufficient.

Eleanor Lamb's Harpoon Pre-paint


We started off with a couple of small test pieces and everything seemed to be working okay. First, we sealed all of the foam with Elmer’s glue. We do this so that the Shellac won’t eat into it. Next we hit the pieces with at least three layers of Shellac and allowed it to dry completely before moving on to the paint. I sprayed in light layers in very short sessions. The open window and fan did the trick for adequately getting rid of the paint fumes; however, after a couple of hours, I noticed that it was not so efficient for getting rid of the residual paint particles that did not adhere to the cosplay pieces. Instead, it was falling in a fine layer of dust all over everything… :/

 A couple of hours of cleaning later and only a small percentage of Cosplay pieces painted – it was back to the drawing board.

C2E2 was creeping up faster and faster and still we had constant snow fall and below freezing temperatures, painting outside was still out of the question. We were so desperate that it forced us to be creative. So, after a late night of — social hydration — I decided to use our common laundry room as a new paint studio and to knock out all of the spray painting in a few marathon sessions. It was the only indoor common area that was anywhere near warm enough and had proper ventilation.

Subject Delta's HelmetEleanor Lamb Syringe Eleanor Lamb's Helmet

I didn’t want to piss off the neighbors or get the land lord called so I waited until 2 or 3 am before beginning. I crept as quietly as possible down three flights of stairs to the basement where the laundry room is located. I laid out my painting tarps over a couple of tables and lined up as many pieces as I could that were going to be painted the same base color. I did this every other night or so for a couple of weeks until all pieces were painted with their base coats.  I even spent time after each painting session wiping down any surfaces that might have collected residue; including but not limited to the washing machines and bikes stored there.

Subject Delta's Drill

Seeing everything in living color was really really cool. No really. Really cool. It was amazing to see everything in it’s intended color. They looked real for the first time and I could tell that we’d really done good work. Really. I had a day off work when I did all the big major pieces and I sent Sara so many texts with pictures because it was so exciting. Subject Delta and Eleanor Lamb were really coming together.

Eleanor Lamb and Subject Delta Helmets

We did all of our touch ups with acrylic paint. It wasn’t an exact match, which was frustrating. Luckily, we were going to distress everything so that would help. Plus, the differences in color can give the impression that something has gotten dinged in battle and been patched up. Even though it all worked out, next time we’re going to try to avoid the spray paint.

Subject Delta's Air TanksThere were a couple of pieces that we painted by hand that turned out looking really good, which also served to sway me toward hand painting in the future. Included in this category was the trim of both Subject Delta and Eleanor Lamb’s helmets, the tanks for Subject Delta’s pack and Eleanor Lamb’s arm guards. And for weathering, we used black acrylic paint and the process outlined in our Weathered Metal Effect tutorial which you can find here.

Despite some major stress, sleepless nights and a whole lotta time in transit, we got everything painted and it looked amazing. We were so close to finishing that we could taste it! C2E2 was under a month away at this point, so we were beyond happy to have gotten to this point.

Thank you for following along as we learned a thing or two about spray painting and Chicago winters! — TCG

Level 8:2 – Armor Damaged!

5 Jun

Eleanor Lamb screen shot

As most costumers would tell you, it’s not enough to have a good-looking suit, you have to wear it. I might take that a step further and say that it needs wear and tear to complete it. Thanks to the help of an amazing friend and her superb, sewing skills we had Eleanor Lamb‘s suit but it was up to us to give it a story.

The first step in removing the shine of our new suit  was a couple of rounds of tea staining. First, we soaked the suit in water and then put it into some fresh tea. We left it to soak for about 2 hours, swishing it around every half hour. The picture below is from our test strip and you’ll notice that not all of it is submerged. That’s why we rotated the suit around in the tea soak, we wanted it to look “patchy.”


Once it dried, we added the serial numbers. Check out the reference photo above, on the right side of her chest you can see some tiny, faded numbers. Hard to read aren’t they? It took us a long time but we finally found an action figure that has the numbers prominently displayed; 726. We decided to use spray on fabric paint which we tested prior to using it on the suit.

Daniel free-handed the numbers and then cut the stencil into some scrap foam we had lying around and we were set to spray our suit. We started by laying out a painting tarp and putting cardboard between the layers of the suit to prevent bleed through.

Suit prep for spray


Next, we positioned the stencil and proceeded to cover the rest of the suit in cardboard to prevent any wafting paint particles. Then, using long sweeping motions, I sprayed the paint across the stencil.

Numbers on Eleanor Lambs Suit

After the numbers dried, it was time to add the blood and the rust. First, the blood.

Eleanor Lamb Suit Blood EffectWe decided to use acrylic paint primarily a Venetian Red. Since we’re not dealing with fresh blood, we added some brown as well. First, I put down a layer of paint and then hit it with a spray bottle of water. I wanted to get the look of actual liquid running rather than trying to fake it with a paint brush. Interested in the nitty-gritties? Head on over to our Rust on Cloth Effect Tutorial.

Once I got the look I wanted, I went back in with deluded paint to make it more pronounced. I did the same thing with the smaller cut on the stomach and the arm.

The rust proved to be a bit trickier.

We did a little digging around for a tutorial but didn’t find a whole lot for rust of on clothing aside from rubbing the suit on a rusty piece of metal. So we decided to use chalk for the rust.

Here’s the nifty article we found about using chalk.

Using the same technique as the blood, I started working on the rust. Since copper oxidizes differently than, say iron, I decided to use green, yellow and brown instead of a typical red, orange and brown. Feeling encouraged by how well the blood effect went, I started working the chalk into the suit.

Eleanor Lamb's Suit Rust Eleanor Lamb Suit Rust Wet

The only thing I didn’t account for, is how dark the chalk is when it’s wet and how light green and yellow chalk are when dried. Imagine my frustration after spending hours hunched over on the floor only to find to find out the next day that it’s not nearly dark enough to be noticed. It was also very difficulty to get the coverage right. I would try to dry the chalk with a hair dryer before putting on the damp suit and then the helmet and having Daniel take pictures so that I could see where the lines needed to be adjusted. A mannequin would have so come in handy right about now.

Eleanor Lamb's Suit with Rust

It took about ten hours total to get the effect that I wanted but, in the end, it was worth it.

As I was working on the rust effect, I also noticed that there are faint brown lines around Eleanor Lamb’s waist and thighs. I assumed that these were markings from the leather shorts and leg wrappings that Big Sisters typically wear. So I used more brown chalk to suggest a faded line where the wet leather might have marked the white suit.

Last but not least, the final detail to Eleanor Lamb’s suit, the oil stains. For this, we used charcoal and a wet paint brush and tried to copy the smudges from the concept art and viola; a distressed suit!

And here’s our finished product in full production!

Photo by Geek Behind the Lens Photography

Photo by Geek Behind the Lens Photography

Thanks for following along! Hopefully, you found this helpful and maybe a little entertaining! — TCG

Rust on Cloth Effect

4 Jun

Eleanor Lamb's Suit with Rust


Over the course of creating our first cosplay, we spent a substantial amount of time combing the internet for tutorials, tips and tricks from more experienced craftspeople. While we found a lot of info about utilizing rusty metal and transferring it onto fabric but, since this was something that I’d be wearing, I wanted to use a method that wasn’t so dirty. Here’s what we cooked up.

Materials Needed

  • Chalk
  • Paint Brush
  • Cup of Water
  • Spray Bottle with Water

Chalk DustFirst things first, do a little research to determine your color palate. Different types of metals result in different colors of rust. For this example, we’ll be working with a brown, red and orange color palate. We bought a package of chalk from our local craft store and then used sandpaper to get our dust on.

Next hit your cloth with the spray bottle. You want it saturated so that it will really soak up the chalk.

Now we add some color. With your wet brush, mix up your colors and then slather the chalk onto the cloth. This line would serve as the source of the rust.

wet brush paint paint on cloth

Next, use the spray bottle to make that color run. Make sure that your spray bottle is set to mist so that you can control the amount of water you’re using. If it’s set to a stream you might delude the chalk too much and you won’t have a clear source of rust. Then, just let it run.

The nice thing about chalk is, if you over water your rust source or if you want to make certain areas of the running color darker than others, you can go back in with your paint brush. Then, let it dry.

We also used a similar technique for the blood on Eleanor Lamb’s suit.

Photo by Geek Behind the Lens Photography

Photo by Geek Behind the Lens Photography

Thanks for checking us out! Hope you found this to be helpful! — TCG

Weathered Metal Effect Tutorial

15 May
Photo by CB Lindsey

Photo by CB Lindsey

During the amazing eight hours that we were in costume at C2E2, we received a large number of compliments about our work weathering and distressing our helmets. This was a very time-consuming process on larger pieces but it’s fairly simple to execute.

Materials Needed

  • Black Acrylic Paint
  • Paint Brush
  • Paper Towels or a Rag
  • Q-Tips

Painted Weight

First off, if you’re going to be adding this weathering technique to a piece that you’ve already painted, make sure that your paint has completely dried. We’re going to be applying black paint and then rubbing it off and you wouldn’t want your first coat of paint to smear.

In this instance, we’re working with craft foam that’s been shellacked and painted with spray paint. We’ve allowed it to dry completely before we started working on the weathering.

Next, using your paint brush, slather on the black acrylic paint. You can put it on thick because you’ll just be wiping it all away in a few moments. You don’t want to cover too much of the surface in the paint at the same time or you run the risk of it drying before you have a chance to attack it with the paper towel or rag. Take it in sections. It’s alright if some spots are uneven; in real life things don’t usually get the same amount of dirty in all places, right?

Weathering the Weight

Wipe Paint off WeightAs you can see in the picture above, we’re just wiping the paint away with an old dish rag that we decided to sacrifice to the Cosplay gods. Remember, the goal here is not to completely wipe away the paint. The goal is to leave just enough to make the piece look dirty; as if someone had tried to clean it once but done a terrible job.

If you rub off too much of the paint, go back and reapply. Keep at it until you’re happy with the amount of grunge.

You can also use a Q-Tip to really get into the nooks and crannies. In the example below, Daniel used a Q-Tip to heavily apply the paint in the small holes of the weight.

Weathered WeightIn the case of Subject Delta’s helmet, we used a thinner brush to get in between all of the cap nuts and Q-Tips to get in between the panels on the top of Eleanor’s helmet. It’s pretty easy, albeit time-consuming but the results are worth it as you can see below.

Subject Delta's Helmet Painted Subject Delta's Helmet Distressed

We learned how to do this by watching a tutorial put up by Valentine Cosplay, a fantastic cosplayer we’ve been following since we had the pleasure of stumbling across his blog. He has a You Tube channel filled with little gems if you’d like to check him out.

Weathered Metal Effect Tutorial

Hope you found this helpful!! — TCG

Level 9:1 – Upgrade Footwear

15 May

Time to build some heavy-duty, splicer stompin’ boots!!!

If you’ll recall from previous posts, we found some killer, rubber galoshes to serve as the base for our Subject Delta Boots.

Subject Delta boots


We found them at a uniform surplus store. They were perfect because they were meant to be worn over regular shoes so they were already over-sized. Plus they had some great metal buckles which add a nice touch and they were on sale for $30 bucks!

If you’ll notice from the reference photo below, Subject Delta’s boots are a little shorter than the boots we picked.

delta boot reference

So, we started off by marking how much we wanted to cut away and then used our box cutter to trim away the excess.

Boots Pre Cut Boots Cut


With the boots cut to the right height we could add the metal that runs along the sides and up over the toes of the boot. Check out the reference photo above. See how the straps appear to be securing a metal step-in “sled?” We decided that these metal soles must be something that could be stepped into and then strapped on. We wanted the boots to appear heavy and gnarly without actually making them heavy, so we decided to craft the “sled” out of foam. I started by cutting out a 2″ wide strip of 2 mm foam to serve as the front of the sled that wraps around the boot. I lined it up and glued it into place with hot glue:

Boots With Front Foam Boots With Full Front Foam


With the first piece of the sled in place, I cut out a foam topper piece that was slightly curved on the backside and to couture to the shape of the first piece along the front of the boot. I had to try a couple of time to get the shape just right, but once I was satisfied with the shape, I hot glued it into place on top of the boot and sealed the edges together with hot glue as well:

Boots With Top FoamAt first, I thought about stopping there for a nice “steel toed” look, but Sara pointed out that the trim should travel all the way around the bottom edge of the boot thus giving it that “sled” look. So, I cut out another long strip of 2″ wide foam and hot glued it into place, connecting the trim all the way around the back of the boot and to the other side. Then I drilled holes straight through the foam and the rubber of the boots and fitted the “sled” with some light-weight bolts and cap nuts for that riveted look.

Boots With Side Foam Boots Complete Foam


With the “sled” trim piece complete, there was only one thing left to do — Paint them!!!

You’ve seen bits and pieces of partially painted items here and there, but this is the first piece we had actually, fully painted!

I started by sealing the foam pieces with a couple of coats of watered down Elmer’s glue. Once dried, I then sprayed the foam with three coats of shellac, allowing the layers to fully dry in between applications.

Once sealed and shellacked, I then taped off the foam pieces and hit the rubber boot with a couple of light coats of Rust-Oleum Enamel Gloss Leather Brown Spray Paint to give it the look of leather. After that dried, I then peeled the tape from the foam and taped off the newly painted brown leather boot section so I could hit the foam trim with a couple of coats of Rust-Oleum Antique Brass Spray Paint.

Boots Painted


Bad ass if I do say so myself!!!

With the boots painted in their base colors, we added a couple of our hand stitched straps and buckles by poking holes through the strap and fastening them in place with the bolts and cap nuts. Then we distressed them:

Boots Distressed

Boots With Full Paint and Distress

Boots Distressed (2)


For the distressing we decided to keep it simple. We did a light, dry brushing of black acrylic paint, let it dry briefly for 10-15 seconds and then rubbed away most of the excess with cloths and q-tips leaving behind the desired amount of grit and grime. We did this all over the boots themselves as well as the brass, metal “sled” and leather strapping with buckles. We paid special attention to certain areas such as the grooves around the cap nuts and other nooks and crannies. We wanted to make sure that these areas had the highest concentration of grime, just like you would see with natural wear and tear. You can view our quick tutorial here.

Here’s another couple of shots of the finished product with the suit:

Boots Complete Boots Complete (2)


We hope that you found this helpful! — TCG

Level 8:1 – Construct Suit

14 May

Eleanor Lamb screen shot

Cosplay can be very daunting when you don’t know how to sew or own a sewing machine. When we started working on our Bioshock 2 cosplay, we were banking on being able to purchase both of our suits and the modify them to fit our needs. Daniel found the suit for Subject Delta easily enough at a uniform surplus store but Eleanor Lamb’s suit gave us considerably more trouble.

The first thing we looked for was a work suit or coveralls for women. We thought that maybe we could have it altered to fit my short frame once we found it but, as it turns out, there aren’t a lot of coveralls made for short women and there are even fewer that come in white.

Our next thought was to search for a bio-hazard suit. Those come in white and there should be some that are made for the shorter folks in the world. Turns out, most of them are disposable and come in a one-size fits all variety.

Next, I started searching for catsuits which are defined as a one piece garment that covers the torso, legs and sometimes the arms. Spot on, right? Wrong. If I wanted  purple one piece leotard with fur cuffs I would have had no trouble finding what I needed. But, alas, we’re not going for sex-kitten here.

Probably the closest thing we found was a flight suit we stumbled across at the army surplus store. They didn’t come in white, but they were available in my size and came in tan. We thought that maybe we’d bleach it.

But then Daniel, who never tires of Google searches, came across a website that sold an even better version of what we needed. It was light weight and came in a light shade of khaki that could easily be bleached. Plus, it was made for women!

It was, by no means, perfect. But it was the best of all the things we’d found. I placed my first order back in November. I won’t give the name of the company but I will say that they are a retail outlet vendor operating out of China. If there are any seasoned cosplayers from the US reading this who are now groaning and shaking their heads, believe me, I learned my lesson.

I ordered a small size and, when it arrived about a month and a half later, I couldn’t even pull it up over my thighs. No exaggeration here. I’m not saying this to mean that it was so tight that I had to roll it up over my knees and onto my thighs and then I could barely move in it. I literally mean that I could not, even with additional help, force it up past my knees. Disheartening? Yes.

At first, I thought about returning it and exchanging it. But, I would have had to have paid for shipping. Shipping to China cost more than the suit itself. I didn’t find this to be an unreasonable request from the vendor but it made more sense for us to just eat the money and order another suit. This time I ordered a large.

Another month and a half later, I received my large. Allow me to put this into perspective for everyone. I am 5’2 and my pant size can range anywhere from a 6 to an 8 depending on the store. Yes, a small might have been ridiculous but a large should have been a safe bet. I was able to roll the suit like panty-hose up my legs and then hoist the top of the suit up over my shoulders as if they were a tight pair of suspenders. I could get my arms into the sleeves but there was no way that I could button the suit. I thought that maybe I could stretch it a bit but, as I lunged, the inseam ripped. Even as I’m typing this months and months later, I can remember how frustrated I was. It was time for a new strategy.

Let me introduce you to Adina.

This is her in her amazing Alana cosplay she built just in time for C2E2. If you dig her style, hit up her Tumblr. She has posted her own work as well as a wealth of tutorials there for your perusal.

Alana Saga Cosplay

This is her in her amazing Alana cosplay she built just in time for C2E2. Eleanor Lamb’s suit would not have been possible had she not swooped in and offered to save the day with her mad sewing machine skills. I was especially grateful for her help since we were a mere four months away from the convention and the time it would have taken me to learn to sew and purchase a sewing machine might have resulted in calamity!

She picked out an appropriate pattern – Kwik Sew, pattern KSP3052 which was, of course, a catsuit. She let me accompany her out to purchase material, we chose a stretch knit fabric in an off-white color and she went to working her magic. She even went above and beyond to add the patches to the suit. When I got it back, I couldn’t have been happier. After going through so many disappointing purchases and trips to fitting rooms, the feeling of trying on a suit that fit so beautifully was the best feeling in the world. Here’s a couple of pictures for comparison.

Eleanor Lamb Cosplay Eleanor Lamb screen shot

 Pretty fantastic, if I do say so myself. Once again, I want to express my gratitude to my friend. Her generous assistance made my cosplay possible.

This was quite a wordy post. Thank you for letting me vent my months old frustration! I can promise you that the next post will have more than enough pictures and processes to make up for everything! Next up – weathering and distressing the ever-living hell out of this pristine suit! — TGC